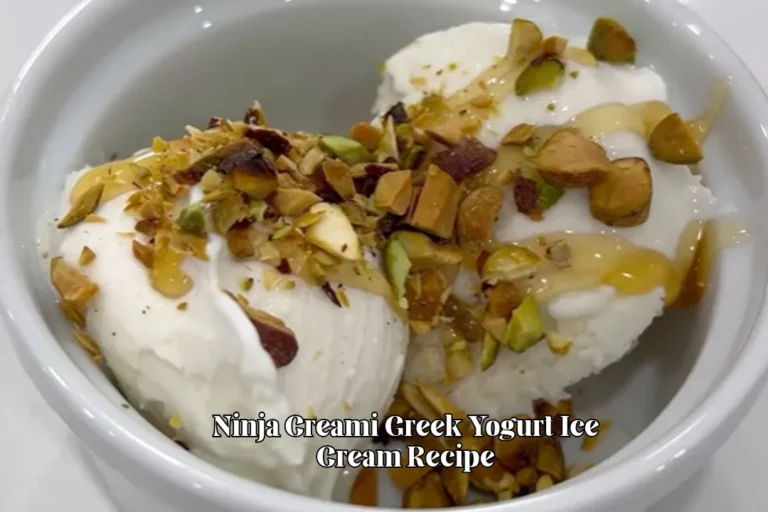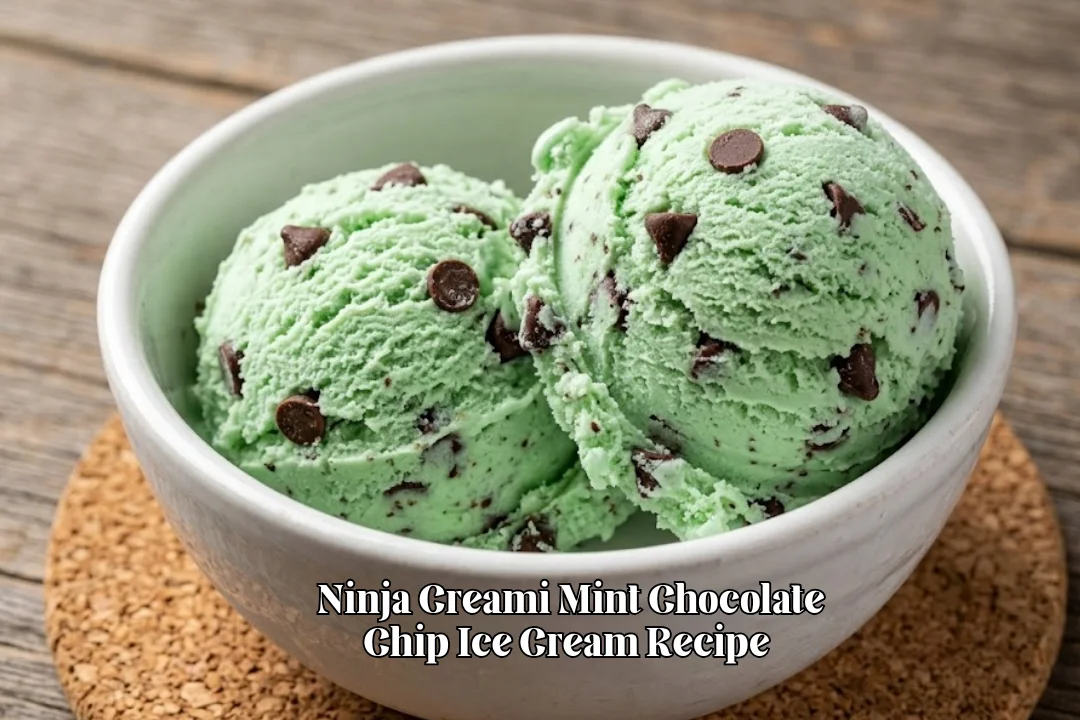
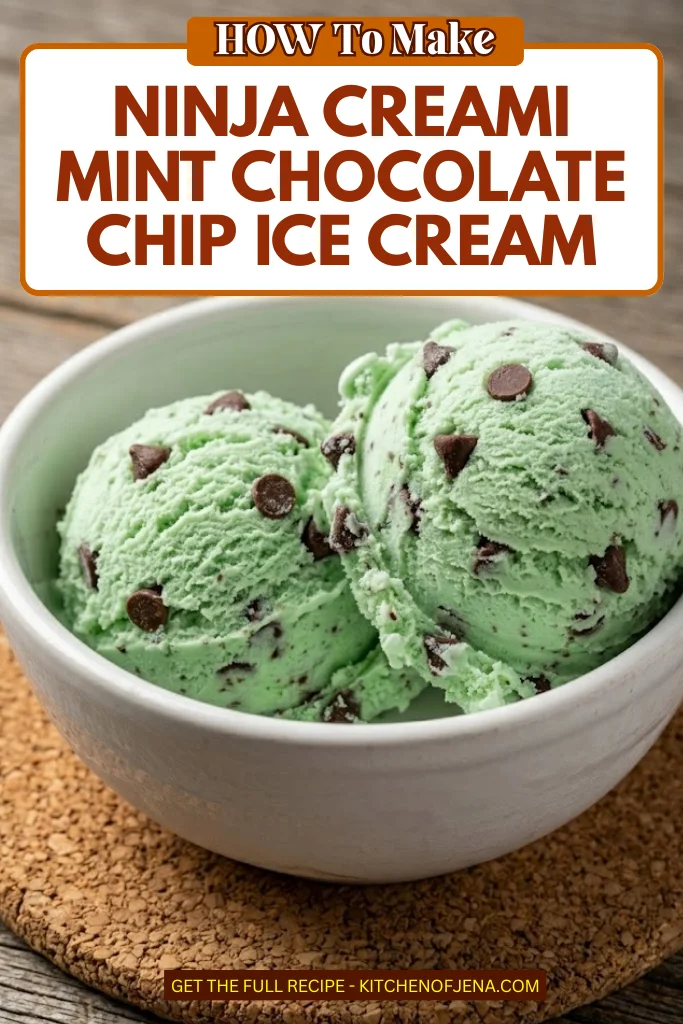
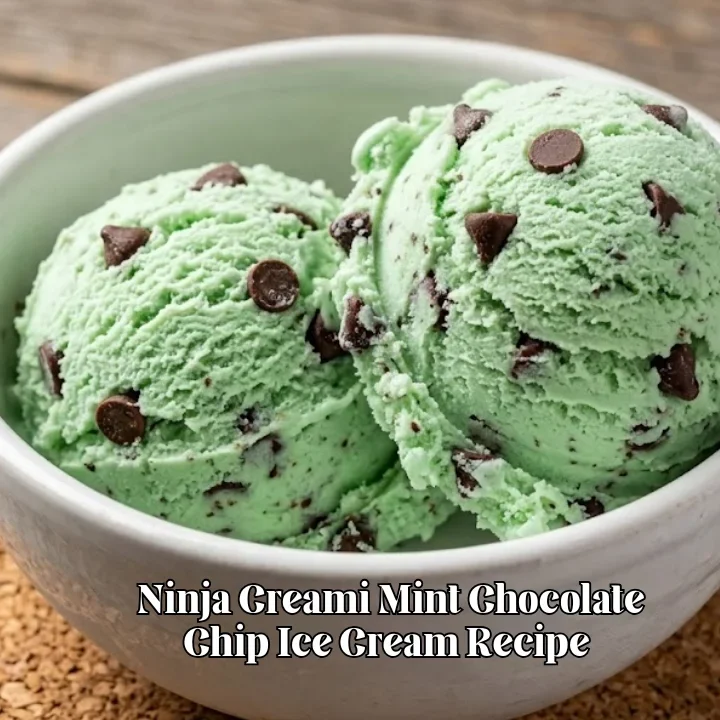
Ninja Creami Mint Chocolate Chip Ice Cream Recipe
After making vanilla ice cream and chocolate ice cream in my Ninja Creami, I could not stop thinking about a homemade Ninja Creami Mint Chocolate Chip Ice Cream Recipe.
Mint chip ice cream has always been one of those classic flavors I order at ice cream shops, especially during warm summer nights.
So I finally made my own version at home, and honestly, it came out even better than I expected.
The mint flavor tastes cool and fresh, the texture turns extra creamy, and those little chocolate chips make every bite so good.
I used simple ingredients like heavy cream, whole milk, peppermint extract, and chocolate chips, but the Ninja Creami made it taste like a real scoop shop dessert.
What I really love is how smooth and soft this homemade mint chocolate chip ice cream gets after the respin cycle.
If you enjoy easy Ninja Creami ice cream recipes and homemade frozen desserts, this Mint Chocolate Chip Ice Cream Recipe deserves a spot in your freezer too.
Why You’ll Love This Ninja Creami Mint Chocolate Chip Ice Cream
I keep making this Ninja Creami Mint Chocolate Chip Ice Cream because it tastes fresh, creamy, and better than most store-bought tubs I tried lately.
The texture turns extra creamy – The heavy cream and respin step make the ice cream soft, rich, and easy to scoop instead of icy or hard.
The mint flavor stays balanced – The peppermint flavor tastes cool and fresh without tasting too strong or fake after freezing overnight.
The chocolate chips mix perfectly – Mini chocolate chips spread through the pint evenly, so you get crunchy little bites in almost every spoonful.
The recipe uses basic ingredients – Everything in this recipe is easy to grab from regular grocery stores, which makes homemade mint chocolate chip ice cream feel simple and stress free.
Ninja Creami Mint Chocolate Chip Ice Cream Ingredients
1 cup heavy cream – I use heavy cream because it makes the ice cream rich and creamy. It gives the frozen base a smooth texture that tastes close to premium mint chip ice cream from dessert shops.
1 cup whole milk – Whole milk keeps the ice cream soft without making it too thick. I tried lower fat milk before, but the texture turned more icy after freezing overnight.
½ cup powdered sugar – Powdered sugar mixes faster than regular sugar and helps the base stay smooth. I like using it because it melts right into the cream mixture without extra stirring.
1 teaspoon peppermint extract or mint extract – Peppermint extract gives the ice cream that cool mint flavor everybody expects. I usually use pure peppermint extract because the flavor tastes cleaner and fresher after freezing.
1 to 2 drops green food coloring – This part is optional, but I still add a little because it gives the ice cream that classic mint chocolate chip color people recognize right away.
¼ cup chocolate chips – Mini chocolate chips work best for me because they spread evenly through the ice cream. You get little crunchy bites in every scoop without huge hard chunks.
1 tablespoon heavy cream for respin – Sometimes the first spin looks dry or crumbly. A little heavy cream during the respin helps turn the texture soft, creamy, and easier to scoop.
Kitchen Appliances You’ll Need
- Ninja Creami machine
- Ninja Creami pint container
- Blender
- Measuring cups
- Measuring spoons
- Spoon
- Spatula
- Freezer
- Ice cream scoop
How To Make Ninja Creami Mint Chocolate Chip Ice Cream
Step 1 | Blend the Base Mixture
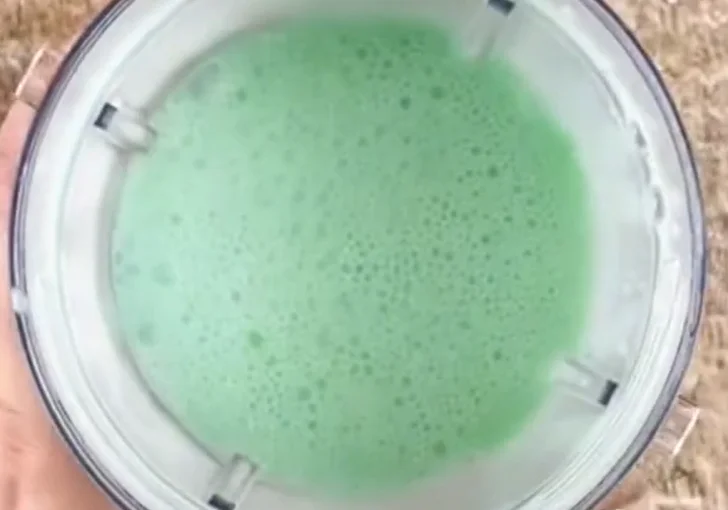
Pour the heavy cream, whole milk, powdered sugar, peppermint extract, and green food coloring into a blender. Blend everything until smooth and creamy. I like blending for about 30 seconds so the sugar fully dissolves into the mixture.

Step 2 | Fill the Ninja Creami Pint
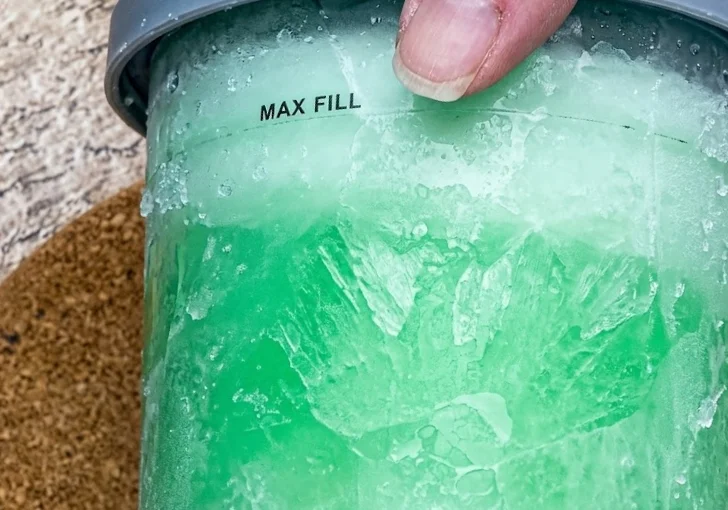
Pour the mint mixture into the Ninja Creami pint container. Make sure the liquid stays below the max fill line. If the container gets too full, the machine may not spin the ice cream evenly later.
Step 3 | Freeze the Ice Cream Base
Place the lid tightly on the pint container and freeze it for a full 24 hours. I always keep the pint on a flat freezer shelf so the mixture freezes evenly from top to bottom.
Step 4 | Spin the Frozen Pint
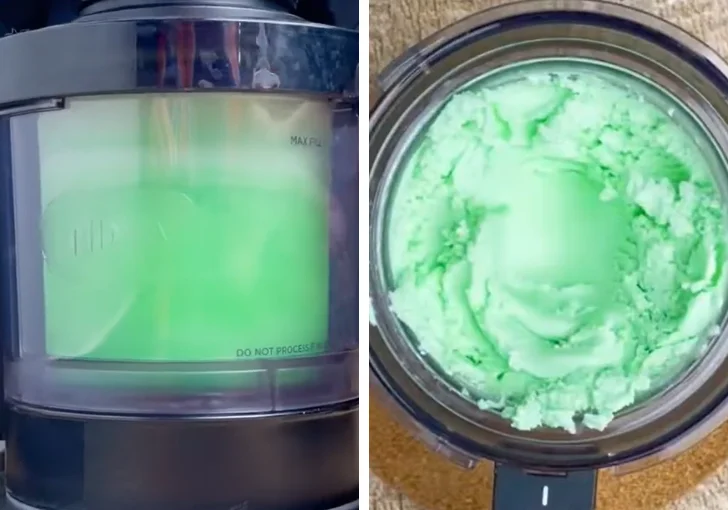
Take the frozen pint out of the freezer and remove the lid. Place the pint into the outer bowl assembly and lock it into the Ninja Creami machine. Run the Ice Cream function and let the machine finish completely.
Step 5 | Respin Until Creamy
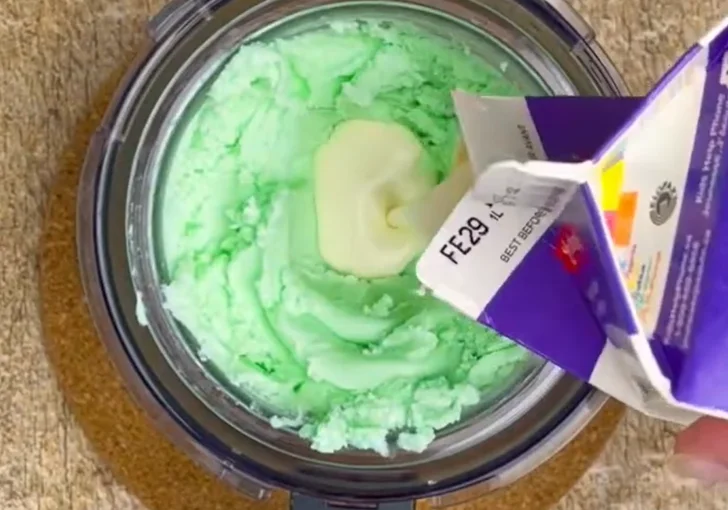
Check the texture after the first spin. If it looks powdery or crumbly, add 1 tablespoon of heavy cream directly into the center. Run the Respin function to make the ice cream smoother and creamier.
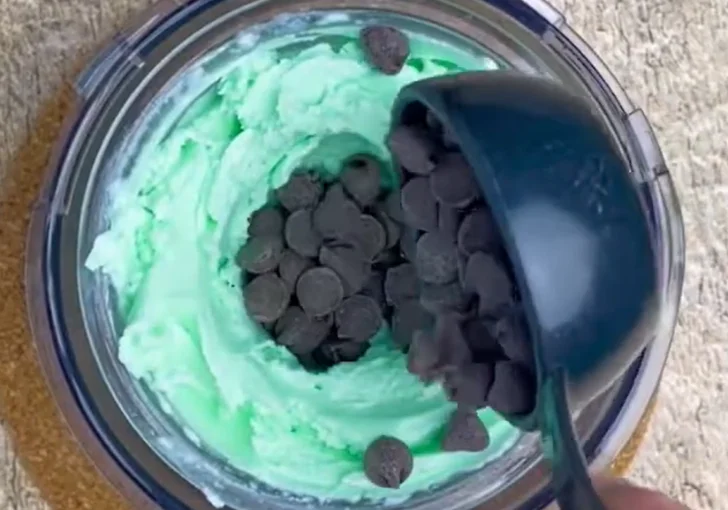
Step 6 | Add the Chocolate Chips
Use a spoon to create a hole in the middle of the ice cream all the way to the bottom. Pour the chocolate chips inside the hole and run the Mix-In function so they spread through the pint evenly.
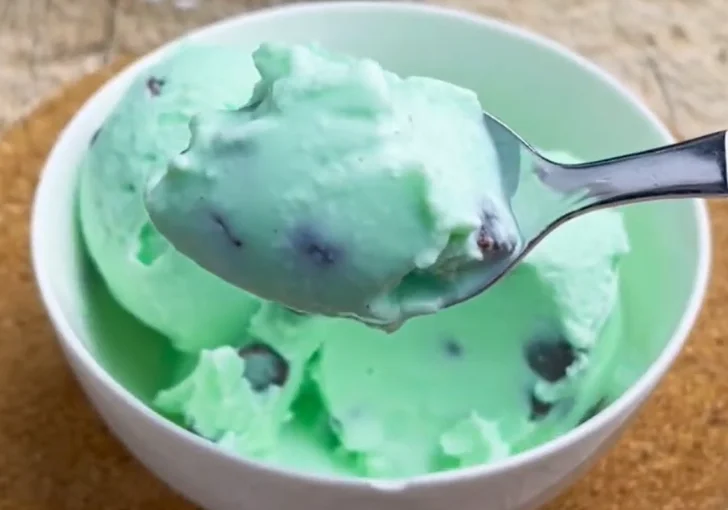
Step 7 | Scoop and Serve
Once the mix-in cycle finishes, the ice cream is ready to eat. The texture should feel creamy and soft with little chocolate bites in every spoonful. I like serving it right away while extra smooth.
Tips & Notes for the Ninja Creami Mint Chocolate Chip Ice Cream
Let the pint sit before spinning – If the pint feels rock hard straight from the freezer, I let it sit for about two minutes first. This helps the Ninja Creami spin smoother and gives better texture.
Use mini chocolate chips if possible – Bigger chocolate chunks sometimes stay stuck together in one area. Mini chips spread through the ice cream much better and give more balanced bites every time.
Do not add too much peppermint extract – Mint flavor gets stronger after freezing. I made that mistake once and the whole pint tasted too sharp. One teaspoon usually gives the best flavor.
Freeze the pint completely flat – A tilted pint can freeze unevenly. I always place mine flat in the freezer because smooth freezing helps the machine shave the ice cream properly later.
Always use the respin if needed – The first spin sometimes looks dry around the edges. A quick respin with a little cream changes the texture completely and makes it taste way creamier.
Keep the lid tightly sealed – A loose lid can let freezer smells get into the ice cream overnight. I always double check the lid before freezing because mint flavor picks up odors fast.
Variations and Adaptations
Add crushed Oreo cookies – Crushed chocolate sandwich cookies make this recipe taste even more rich and sweet. I like mixing them in with the chocolate chips for a cookies and cream mint flavor.
Use dark chocolate chips instead – Dark chocolate gives the ice cream a deeper chocolate taste and balances the sweetness nicely. It also makes the mint flavor stand out a little more.
Try white chocolate pieces – White chocolate chips give this recipe a sweeter flavor and softer bite. The creamy mint base works really good with sweet white chocolate mixed through it.
Make it extra minty – Add a tiny splash more peppermint extract if you enjoy strong mint desserts. I only add a few extra drops because too much mint can overpower the cream flavor fast.
Skip the green coloring naturally – The food coloring only changes the look, not the flavor. Sometimes I leave it out completely and the ice cream still tastes fresh and creamy.
Mistakes To Avoid While Making Ninja Creami Mint Chocolate Chip Ice Cream
Skipping the full freeze time – The pint needs the full 24 hours to freeze solid. I rushed this once and the center stayed soft, which made the texture slushy instead of creamy.
Adding too much extract – Peppermint extract is very strong after freezing. Using extra may sound good at first, but the ice cream can start tasting too sharp and almost bitter.
Overfilling the pint container – Filling above the max line can stop the machine from spinning correctly. The texture may turn uneven and sometimes the lid becomes hard to lock.
Using low-fat dairy only – Lower fat milk makes the texture more icy after freezing. Heavy cream helps the Ninja Creami create that rich scoopable texture people expect from mint chip ice cream.
Skipping the respin cycle – The first spin is not always enough. I almost skipped the respin once and the ice cream stayed dry and crumbly instead of creamy and smooth.
Using large chocolate chunks – Huge chocolate pieces do not mix evenly. Smaller chocolate chips work much better because they spread through every scoop without sinking to the bottom.
Ninja Creami Mint Chocolate Chip Ice Cream Serving Ideas and Mix-ins
Serve with warm brownies – I love scooping this mint chocolate chip ice cream over warm fudgy brownies because the cold creamy texture melts slightly into the chocolate and tastes amazing together.
Top with hot fudge sauce – Warm chocolate sauce over cold mint ice cream creates little crunchy chocolate bits after a minute. The mix of warm and cold textures tastes really good together.
Add crushed chocolate cookies – Crushed cookies add extra crunch and more chocolate flavor. You can sprinkle them on top or mix them into the pint during the final mix-in cycle.
Serve inside waffle cones – Waffle cones give a sweet crunchy bite that works perfectly with the smooth mint filling. I sometimes dip the cone edges into melted chocolate for extra flavor.
Make homemade ice cream sandwiches – Scoop the ice cream between two soft chocolate cookies and freeze them for a little while. The cookies soften slightly and taste really good with the mint filling.
Top with whipped cream and cherries – A little whipped cream and one cherry on top makes this feel like a fun old-school dessert shop treat without doing much extra work.
Leftover Storing
I store leftover Ninja Creami Mint Chocolate Chip Ice Cream in the same pint container with the lid tightly closed.
It stays fresh in the freezer for around one week. After sitting frozen longer, the texture may turn harder than the first day.
Before scooping leftovers, I usually let the pint rest on the counter for two or three minutes.
If the texture still feels crumbly after refreezing, I run the Respin function again with a splash of milk or cream. That helps bring back the soft creamy texture.
I also try keeping the pint away from freezer doors because temperature changes can create ice crystals faster.
Ninja Creami Mint Chocolate Chip Ice Cream Recipe FAQs
Can I use regular sugar instead of powdered sugar?
Yes, regular sugar works fine in this recipe. I still prefer powdered sugar because it blends faster and gives a smoother texture after freezing. Granulated sugar sometimes needs extra blending time before freezing the pint.
Can I make this recipe without green food coloring?
Yes, you can leave the coloring out completely. The mint flavor stays exactly the same. I only add the green color because it gives the ice cream that classic mint chocolate chip look.
Why does my Ninja Creami ice cream look dry after spinning?
This happens pretty often with homemade Ninja Creami recipes. The frozen base sometimes needs extra moisture after the first spin. Adding one tablespoon of heavy cream and using the respin cycle fixes it easily.
Can I use low-fat milk instead of whole milk?
You can, but the texture changes a little. Whole milk keeps the ice cream richer and softer. Lower fat milk usually makes the final texture more icy after freezing overnight.
How long should I freeze the pint container?
The pint needs at least 24 hours in the freezer. If the center stays soft, the machine may not spin properly. I always freeze mine overnight and most of the next day.
What chocolate chips work best in this recipe?
Mini semi-sweet chocolate chips work best for me because they spread evenly through the ice cream. Large chunks sometimes stay stuck together and do not mix through the whole pint well.
Can I make this dairy free?
Yes, but the texture may not turn out as creamy. Coconut milk or almond milk can work, though the ice cream may freeze harder compared to the original dairy version.
Why is my ice cream too hard after refreezing?
Homemade ice cream freezes harder because it does not contain stabilizers like store brands. Letting the pint sit for a few minutes or using the respin setting usually softens it again.
Can I add more mix-ins besides chocolate chips?
Yes, crushed cookies, brownie bits, chocolate candies, or white chocolate pieces work really well. I just avoid adding huge chunks because they do not mix evenly inside the pint.
Do I need a blender for the recipe?
A blender helps mix the ingredients faster and smoother, but you can also whisk everything by hand. I just make sure the powdered sugar fully dissolves before freezing the mixture.
Ninja Creami Mint Chocolate Chip Ice Cream
Ninja Creami Mint Chocolate Chip Ice Cream comes out creamy, smooth, and full of fresh mint flavor with simple ingredients like heavy cream, whole milk, peppermint extract, and chocolate chips. I made this homemade mint chip ice cream in the Ninja Creami machine and the texture tasted just like classic ice cream shop dessert. This easy frozen treat takes only minutes to prep before freezing overnight. Perfect for summer desserts, sweet cravings, or cold homemade treats. You can serve it with brownies, waffle cones, cookies, or warm chocolate sauce for extra flavor.
Ingredients
- 1 cup heavy cream
- 1 cup whole milk
- ½ cup powdered sugar
- 1 teaspoon peppermint extract or mint extract
- 1 to 2 drops green food coloring
- ¼ cup chocolate chips
- 1 tablespoon heavy cream (for respin, if needed)
Instructions
- Pour the heavy cream, whole milk, powdered sugar, peppermint extract, and green food coloring into a blender. Blend everything until smooth and creamy. I like blending for about 30 seconds so the sugar fully dissolves into the mixture.
- Pour the mint mixture into the Ninja Creami pint container. Make sure the liquid stays below the max fill line. If the container gets too full, the machine may not spin the ice cream evenly later.
- Place the lid tightly on the pint container and freeze it for a full 24 hours. I always keep the pint on a flat freezer shelf so the mixture freezes evenly from top to bottom.
- Take the frozen pint out of the freezer and remove the lid. Place the pint into the outer bowl assembly and lock it into the Ninja Creami machine. Run the Ice Cream function and let the machine finish completely.
- Check the texture after the first spin. If it looks powdery or crumbly, add 1 tablespoon of heavy cream directly into the center. Run the Respin function to make the ice cream smoother and creamier.
- Use a spoon to create a hole in the middle of the ice cream all the way to the bottom. Pour the chocolate chips inside the hole and run the Mix-In function so they spread through the pint evenly.
- Once the mix-in cycle finishes, the ice cream is ready to eat. The texture should feel creamy and soft with little chocolate bites in every spoonful. I like serving it right away while extra smooth.
Nutrition Information:
Serving Size: 2-3 servingsAmount Per Serving: Calories: 420Total Fat: 30gSodium: 70mgCarbohydrates: 35gSugar: 31gProtein: 5g
This Ninja Creami Mint Chocolate Chip Ice Cream turned into one of my favorite homemade frozen desserts because it tastes cool, creamy, and simple all at once.
The mint flavor stays fresh, the chocolate chips add little crunchy bites, and the Ninja Creami gives it that soft scoopable texture I really love.
It feels like a real ice cream shop dessert without leaving home. I hope you make this recipe soon and enjoy every spoonful.
If you try it, share your results and don’t forget to follow us on Pinterest for more easy Ninja Creami dessert recipes.