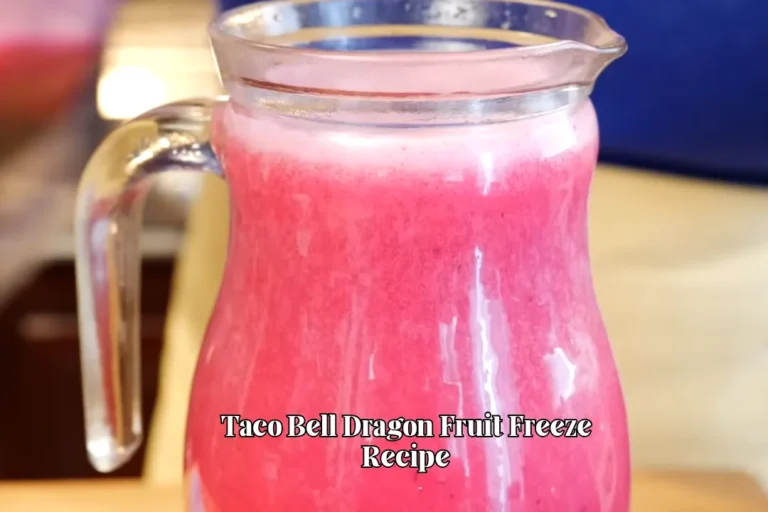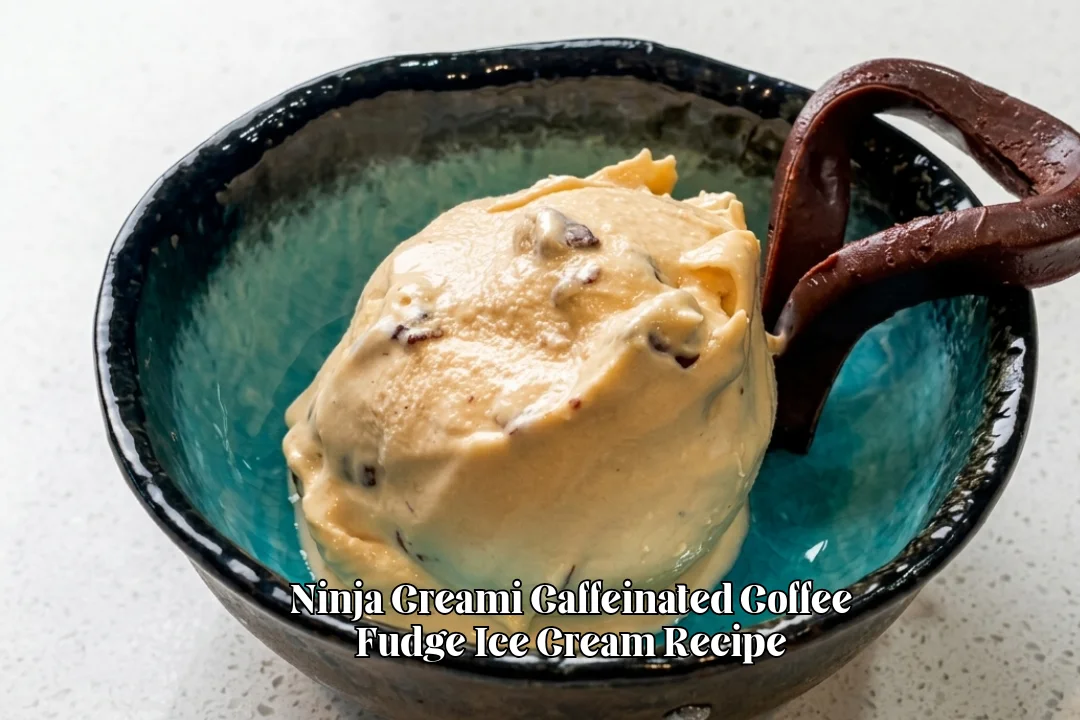
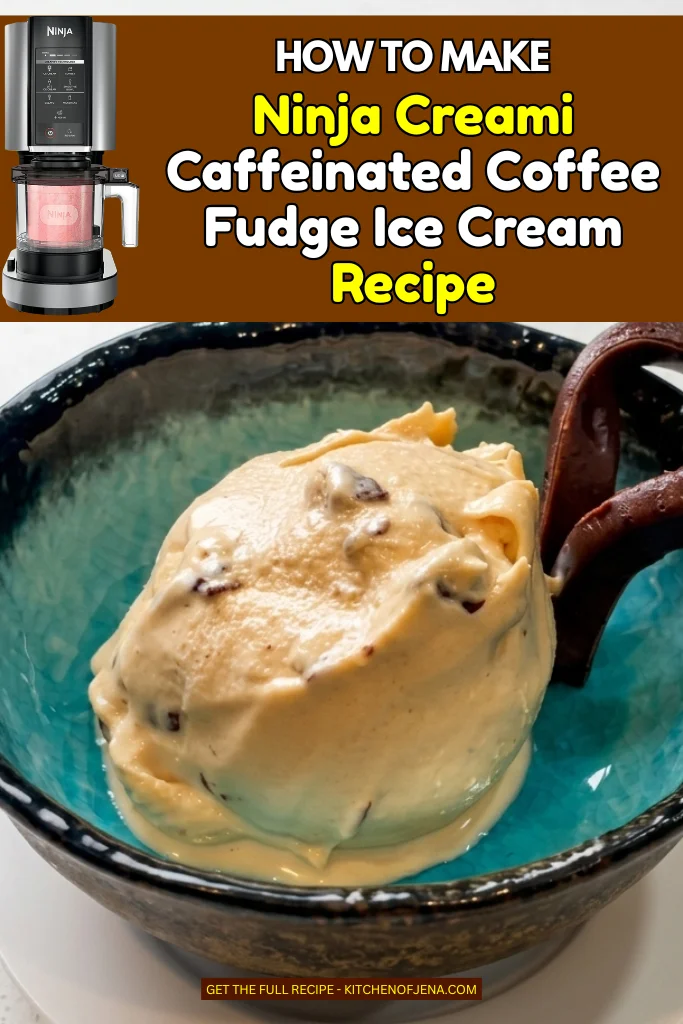
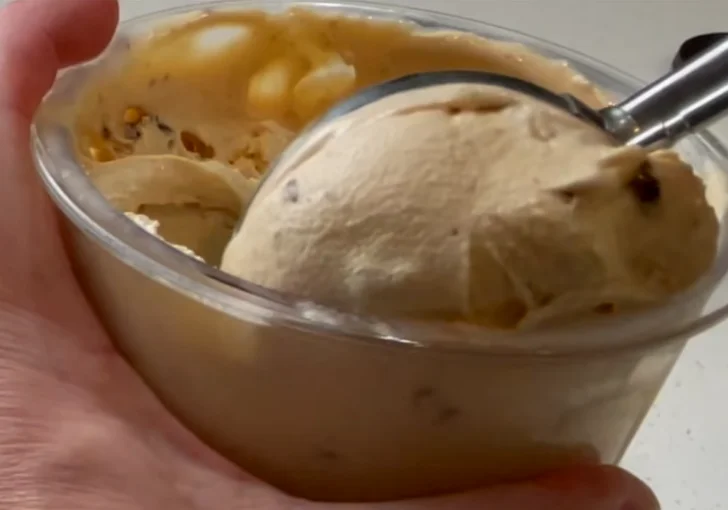
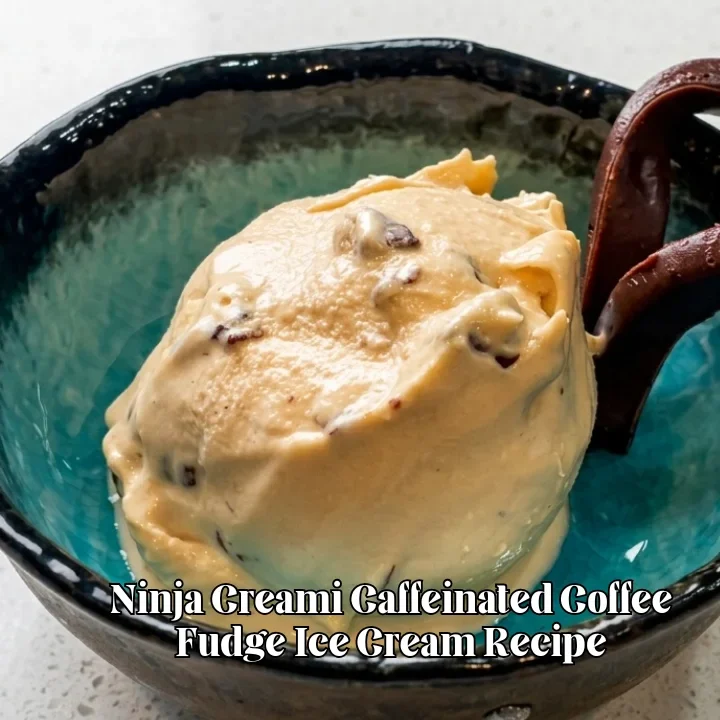
Ninja Creami Caffeinated Coffee Fudge Ice Cream Recipe
The Ninja Creami Caffeinated Coffee Fudge Ice Cream Recipe is something I first tried when I wanted strong coffee taste in ice cream, not the light kind. This recipe hits hard with coffee flavor and sweet fudge bites in every spoon.
I made it at home using simple ingredients, nothing fancy, just everyday kitchen stuff.
The mix of espresso, chocolate, and creamy base gives a bold taste that stays in your mouth.
This Ninja Creami Caffeinated Coffee Fudge Ice Cream Recipe feels special because it brings café style flavor into your freezer. You get real coffee punch, smooth cream, and rich fudge chunks.
I like it because it’s strong, sweet, and a little addictive. If you love coffee desserts, this one is worth trying today.
Grab your Ninja Creami and make this caffeinated coffee fudge ice cream—you will understand why I keep making it again and again.
Why This Ninja Creami Caffeinated Coffee Fudge Ice Cream Recipe is So Popular
I made this recipe many times, and I can say one thing clearly—it stands out because of its strong coffee kick and rich texture.
Bold coffee flavor that stays
- The espresso base is not light or watery. It gives deep coffee taste that feels close to a cold café drink but in ice cream form.
Fudge makes every bite better
- The chocolate coffee fudge adds chewy and soft bites. It breaks the smooth ice cream in a good way, so you never get bored.
Simple ingredients, big result
- Nothing fancy here. Just milk, cream, sugar, chocolate, and coffee. Still, the result tastes like a premium dessert shop item.
Works perfectly in Ninja Creami
- The machine gives a creamy texture without needing long churning. I like how fast it turns frozen base into soft ice cream.
Strong caffeine feel
- This is not a mild dessert. It gives a real coffee boost, so it feels like dessert and coffee together.
Where This Recipe Fits Perfectly
This recipe fits into real life moments when you want something cold, sweet, and strong in flavor. I don’t keep it only for special days.
It works well after dinner when I want something sweet but not plain vanilla. It also fits when I need a quick energy lift with dessert.
I sometimes eat it in the afternoon when coffee feels more like a treat than a drink.
You can also enjoy it while watching shows at night, or when you want something different from regular chocolate ice cream.
It’s simple but feels bold, and that’s why it fits almost anytime.
Ninja Creami Caffeinated Coffee Fudge Ice Cream Ingredients
190 g whole milk – I use whole milk because it keeps the base smooth and helps balance strong coffee flavor without making it too heavy or too light.
255 g heavy cream – This is what gives the ice cream that rich, creamy texture. I always use fresh cream for best smoothness.
120 g strong espresso – I make strong espresso because weak coffee will not give enough flavor in this recipe. It brings real coffee punch.
130 g granulated sugar – Regular sugar sweetens the mix and balances bitter coffee taste. It also helps texture stay soft.
10 g corn syrup – I add this to stop ice crystals and keep the ice cream smooth when frozen.
45 g skim milk powder – This helps thicken the base and gives a creamy dairy taste without extra liquid.
1.5 g stabilizer (guar gum) – I use a tiny amount to stop icy texture. It makes the ice cream smooth after spinning.
400 g sweetened condensed milk – This is for fudge. It gives sweetness and sticky texture that holds chocolate and coffee together.
200 g dark chocolate – I use dark chocolate because it gives strong cocoa taste that matches coffee well.
20 g instant coffee – This boosts coffee flavor in fudge. It makes every bite stronger and bold.
Kitchen Appliances You’ll Need
- Ninja Creami machine
- Ninja Creami pint container
- Mixing bowl
- Whisk or spoon
- Saucepan (for fudge)
- Freezer space
How To Make Ninja Creami Caffeinated Coffee Fudge Ice Cream
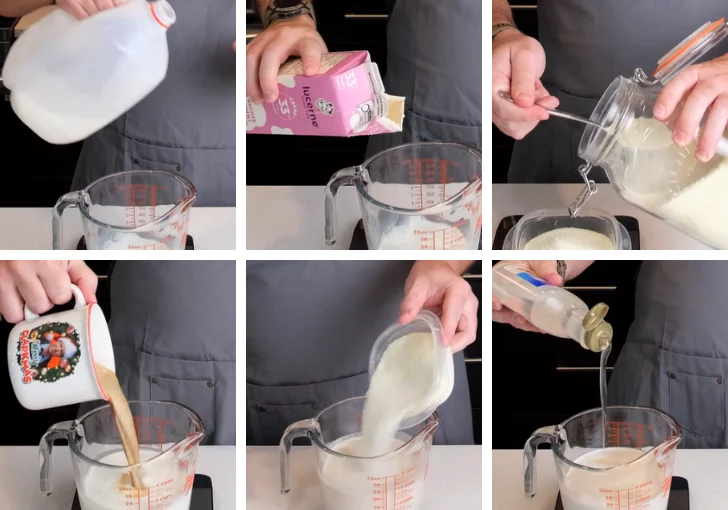
Step 1 | Prepare the Base Mixture
Start by pouring whole milk and heavy cream into a large mixing jug. Add freshly brewed strong espresso for deep coffee flavor. In a separate bowl, mix sugar, skim milk powder, and stabilizer so everything blends evenly. Pour dry mix into liquid and stir well until smooth.
Step 2 | Transfer and Freeze
Pour the prepared mixture into the Ninja Creami pint container. Tap lightly to remove air bubbles so freezing stays even. Place it flat inside the freezer and freeze it overnight or until fully solid.
Step 3 | Make Coffee Fudge
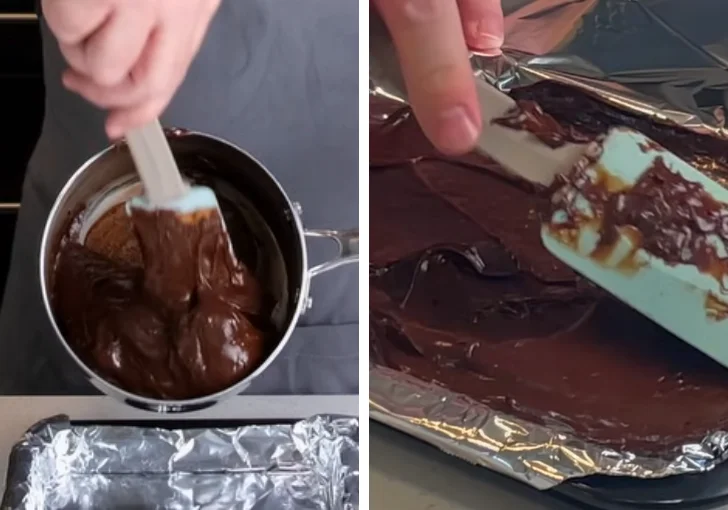
Take a saucepan and add sweetened condensed milk. Break dark chocolate into pieces and add instant coffee. Heat slowly while stirring until everything melts into a thick glossy fudge.
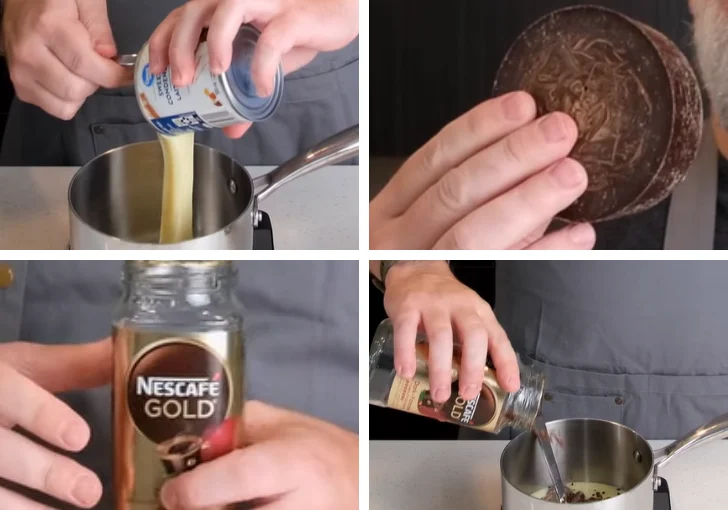
Step 4 | Set the Fudge
Pour the warm fudge into a lined tray. Spread it evenly and let it cool at room temperature. After cooling, place it in the fridge or freezer until firm enough to cut into cubes.
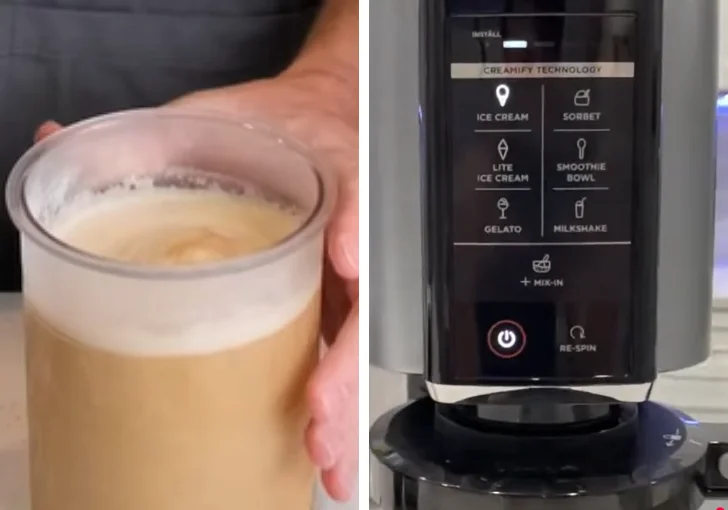
Step 5 | Spin the Ice Cream
Take frozen pint out and place it in Ninja Creami. Run the ice cream cycle until it turns smooth and creamy.
Step 6 | Add Fudge Pieces
Cut the set fudge into small cubes. Add them into the ice cream container and run mix-in setting so fudge spreads evenly.
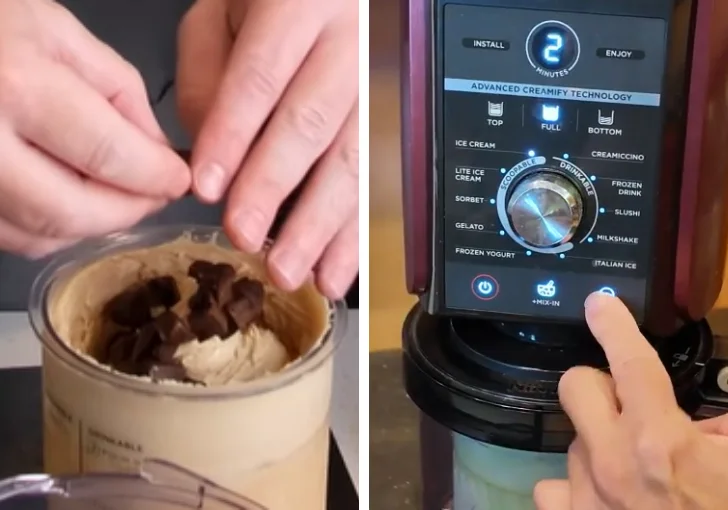
Step 7 | Final Texture and Serve
Once mixing is done, the ice cream becomes smooth with strong coffee base and chocolate fudge bites. Serve immediately for soft texture or freeze a bit for firmer scoop.
Tips & Notes for the Best Ninja Creami Caffeinated Coffee Fudge Ice Cream Recipe
- Strong coffee matters – Use strong espresso or strong brewed coffee. Weak coffee makes flavor flat and less enjoyable.
- Do not skip stabilizer – Even small amount helps stop icy texture and keeps ice cream creamy after freezing.
- Corn syrup helps texture – It keeps ice cream soft and avoids hard ice crystals forming.
- Fudge texture is key – Don’t fully dissolve coffee in fudge. Small grain bits make taste stronger and more fun.
- Freeze fully before spinning – If base is not fully frozen, texture becomes soft and messy after spinning.
Variations and Adaptations
Milk Chocolate Version – You can replace dark chocolate with milk chocolate if you want sweeter fudge. It makes the ice cream lighter in bitterness but still keeps coffee flavor strong and enjoyable.
Extra Strong Coffee Version – Add extra espresso or double instant coffee in fudge. This makes a more intense caffeine hit, perfect for people who like bold coffee desserts.
Less Sugar Option – Reduce sugar slightly and use sugar-free chocolate. It still tastes good but feels less sweet and more coffee-focused.
No Corn Syrup Version – You can skip corn syrup if not available, but texture may become slightly icy after freezing.
Mocha Style Version – Add extra cocoa powder in base to create stronger mocha flavor that blends chocolate and coffee evenly.
Mistakes To Avoid While
Not freezing base fully – If mixture is not fully frozen, it will not spin smooth and may turn watery instead of creamy.
Using weak coffee – Light coffee makes the whole recipe taste flat. Strong espresso is important for real flavor.
Skipping mix-in step – Without proper mix-in spin, fudge does not spread evenly and stays in one place.
Overheating fudge – If chocolate burns, fudge turns grainy and loses smooth glossy texture.
Adding too much stabilizer – Extra stabilizer makes ice cream gummy instead of creamy, so measure carefully.
Serving Ideas and Mix-ins
Chocolate drizzle topping – I like adding warm chocolate sauce on top because it melts slightly into cold ice cream and gives extra richness in every spoon.
Crushed biscuits – You can add cookie crumbs for crunch. It mixes well with soft fudge and creamy coffee base.
Whipped cream topping – A light whipped cream layer balances strong coffee flavor and makes dessert smoother in taste.
Extra fudge chunks – I sometimes add more fudge on top because I like chewy chocolate bites in every scoop.
Coffee dust sprinkle – A small dust of instant coffee on top gives stronger aroma when you serve it fresh.
Leftover Storing
I store leftover ice cream in the same Ninja Creami container with lid tightly closed. It stays good in freezer for up to 2 weeks.
Before eating again, I spin it once more in the machine to bring back creamy texture because freezing makes it firm over time.
Ninja Creami Caffeinated Coffee Fudge Ice Cream Recipe FAQs
Can I use regular milk instead of whole milk?
Yes, you can use regular milk. Whole milk gives richer texture, while low-fat milk makes it lighter. I tried both, and both work, but texture changes slightly depending on fat level.
Do I need espresso for this recipe?
Espresso gives the best strong coffee taste. If not available, you can use very strong brewed coffee or concentrated instant coffee mix. Weak coffee will not give same bold flavor.
Can I skip stabilizer in this recipe?
Yes, but stabilizer helps reduce icy texture. Without it, ice cream may feel slightly icy after freezing, especially because coffee base freezes harder than milk-based ice cream.
Why is my ice cream crumbly after spinning?
This usually happens when base is too frozen or dry. I fix it by adding a splash of milk and re-spinning in Ninja Creami until texture becomes smooth again.
Can I use milk chocolate instead of dark chocolate?
Yes, milk chocolate works fine. It will make fudge sweeter and less bitter. I prefer dark chocolate because it balances strong coffee taste better.
How strong is caffeine in this recipe?
It depends on coffee amount used. With espresso and instant coffee, it has noticeable caffeine kick. It feels stronger than normal coffee ice cream.
Can I make this without Ninja Creami?
Yes, but texture will be different. You can churn it in an ice cream maker, but Ninja Creami gives smoother and denser result.
Why is my fudge grainy?
This happens if chocolate is overheated or stirred too fast. Keep heat low and stir slowly until smooth glossy texture forms.
Can I reduce sugar in this recipe?
Yes, but sugar helps texture. If reduced too much, ice cream may become harder after freezing and lose softness.
How long should I freeze the base?
Minimum 8–12 hours or overnight. It must be fully solid before spinning, otherwise texture will not come out creamy.
Ninja Creami Caffeinated Coffee Fudge Ice Cream Recipe
The Ninja Creami Caffeinated Coffee Fudge Ice Cream Recipe brings strong coffee flavor with creamy texture and rich chocolate fudge in every bite. I made this at home using simple ingredients like espresso, cream, and dark chocolate, and it turns into a bold frozen dessert using the Ninja Creami machine. It takes basic prep and overnight freezing for best results. Perfect for coffee lovers who enjoy sweet and strong flavors together. Serve it with chocolate drizzle or extra fudge chunks for a richer taste you will want to make again.
Ingredients
Ice Cream Base (750 ml Deluxe Batch)
- 190 g whole milk
- 255 g heavy cream
- 120 g strong espresso (or very strong coffee)
- 130 g granulated sugar
- 10 g corn syrup (or glucose / golden syrup)
- 45 g skim milk powder
- 1.5 g stabilizer (such as guar gum)
Coffee Fudge Add-in
- 400 g sweetened condensed milk (1 full can)
- 200 g dark chocolate
- 20 g instant coffee
Instructions
- Start by pouring whole milk and heavy cream into a large mixing jug. Add freshly brewed strong espresso for deep coffee flavor. In a separate bowl, mix sugar, skim milk powder, and stabilizer so everything blends evenly. Pour dry mix into liquid and stir well until smooth.
- Pour the prepared mixture into the Ninja Creami pint container. Tap lightly to remove air bubbles so freezing stays even. Place it flat inside the freezer and freeze it overnight or until fully solid.
- Take a saucepan and add sweetened condensed milk. Break dark chocolate into pieces and add instant coffee. Heat slowly while stirring until everything melts into a thick glossy fudge.
- Pour the warm fudge into a lined tray. Spread it evenly and let it cool at room temperature. After cooling, place it in the fridge or freezer until firm enough to cut into cubes.
- Take frozen pint out and place it in Ninja Creami. Run the ice cream cycle until it turns smooth and creamy.
- Cut the set fudge into small cubes. Add them into the ice cream container and run mix-in setting so fudge spreads evenly.
- Once mixing is done, the ice cream becomes smooth with strong coffee base and chocolate fudge bites. Serve immediately for soft texture or freeze a bit for firmer scoop.
Nutrition Information:
Serving Size: 1 scoop (approx. 120–150 g)Amount Per Serving: Calories: 320Total Fat: 18gCarbohydrates: 35gFiber: 0gProtein: 6g
The Ninja Creami Caffeinated Coffee Fudge Ice Cream Recipe is one of those desserts I keep coming back to because it mixes strong coffee taste with smooth ice cream and rich fudge in every bite.
It feels simple but gives bold flavor that stays with you. If you love coffee desserts, this recipe will easily become a favorite at home. Try it once, adjust it your way, and enjoy it cold and fresh.
Share your version with us, and don’t forget to follow us on Pinterest for more easy homemade ice cream ideas.