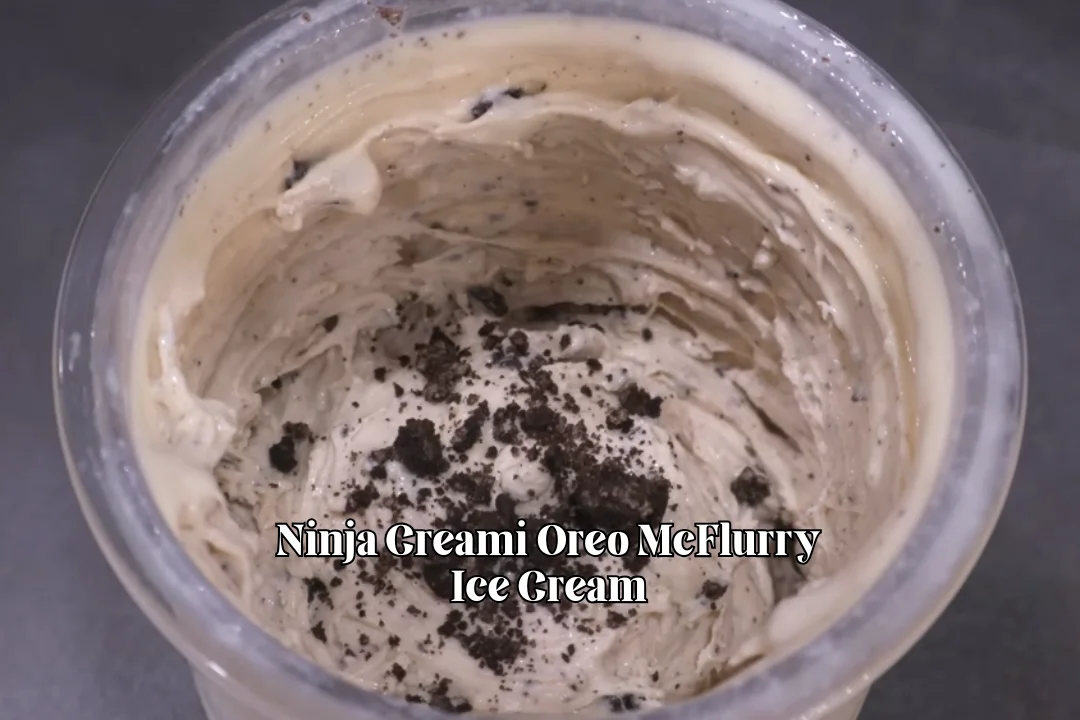
Ninja Creami Oreo McFlurry Ice Cream Recipe
Have you ever had a craving for an Oreo McFlurry but didn’t feel like heading to McDonald’s? If you have a Ninja Creami at home, you can make a creamy, cookies-and-cream dessert right in your own kitchen.
It has that familiar vanilla ice cream and Oreo combination, but you get to decide how many cookie pieces go into every spoonful.
What I like about this Ninja Creami Oreo McFlurry is how simple the base is. Milk, heavy cream, cream cheese, maple syrup, vanilla, and cookies and cream protein powder come together before the pint goes into the freezer.
After it spins, a quick Re-Spin helps give it that thick, soft-serve-style texture.
Today, I’m sharing my Ninja Creami Oreo McFlurry Ice Cream Recipe, including the tips I use for a creamy texture, crunchy Oreo mix-ins, and an easy homemade McFlurry you can enjoy whenever the craving hits.
You can also swap in vanilla protein powder or add extra Oreos if you want more cookie flavor.
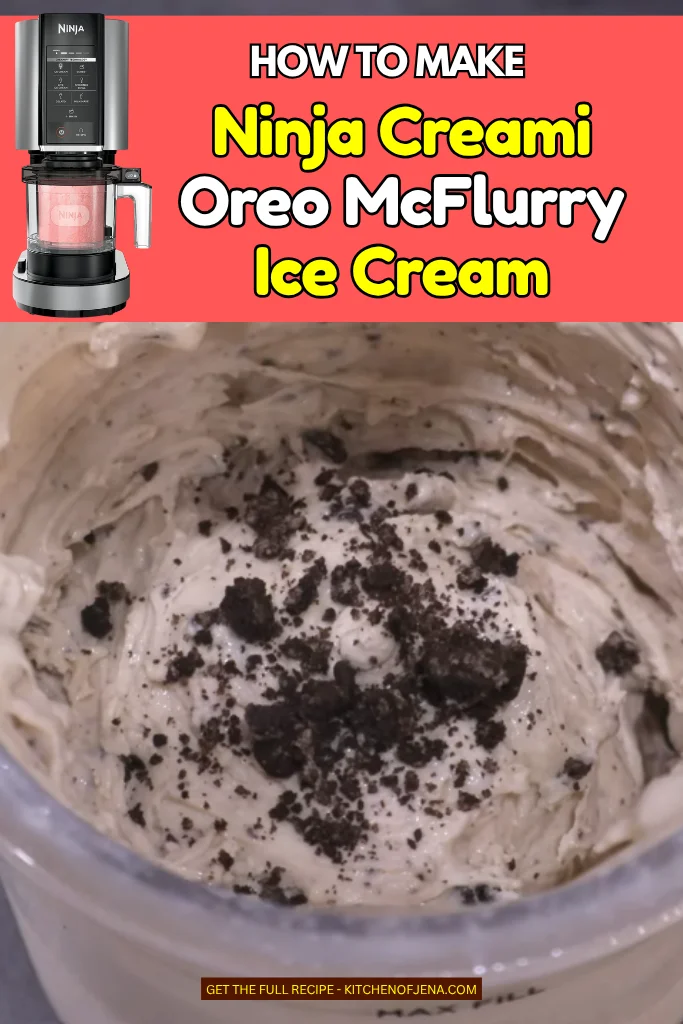
My Homemade Ninja Creami Oreo McFlurry vs. McDonald’s McFlurry
If you are making this recipe because you love McFlurries, it helps to know what is different about the homemade version.
| Homemade Ninja Creami Version | McDonald’s McFlurry |
|---|---|
| Made at home | Made at the restaurant |
| Processed in a Ninja Creami | Prepared using restaurant equipment |
| Oreo amount can be adjusted | Portion is set by the restaurant |
| Uses protein powder in this recipe | Standard McFlurry does not use protein powder |
| Sweetness can be adjusted | Recipe is fixed |
| Can be frozen for another serving | Usually enjoyed right after purchase |
| Extra toppings are easy to add | Toppings depend on the menu option |
What Does a Ninja Creami Oreo McFlurry Taste Like
The first flavor you notice is the vanilla. It is creamy and lightly sweet, with a little extra richness from the heavy cream and cream cheese.
Then you get the Oreos.
I like using a mixture of smaller crumbs and slightly larger pieces. The smaller pieces blend into the ice cream and give it more cookie flavor, while the larger pieces give you something to bite into.
The cream cheese is subtle. It does not make the ice cream taste like cheesecake.
Instead, it adds a slight tang that keeps the sweet ingredients from tasting flat.
Ninja Creami Oreo McFlurry Ice Cream Ingredients
1 cup milk – I use whole milk because it gives the base a richer, smoother texture. You can use another type of milk if that is what you have.
¼ cup heavy cream – I add heavy cream for extra richness. It helps make the finished ice cream feel thick and creamy.
2 tablespoons maple syrup – I use maple syrup to sweeten the base. It also adds a light flavor that works nicely with the vanilla and Oreos.
1 teaspoon vanilla extract – I add vanilla extract for a smooth vanilla taste. It helps round out the flavor of the whole ice cream base.
⅛ teaspoon salt – I use a small amount of salt to balance the sweetness. It may seem like a tiny amount, but it makes a difference.
2 tablespoons cream cheese – I add cream cheese to give the ice cream a thicker and creamier texture. It also adds a mild tang.
¼ cup cookies and cream protein powder – I use cookies and cream protein powder for extra protein and more cookie flavor in the base.
4 Oreo cookies – I crush the Oreos and divide them between the ice cream and topping. This gives the dessert its classic cookie crunch.
If Using Vanilla Protein Powder
You can use ¼ cup vanilla protein powder instead of cookies and cream protein powder. Add 1–2 crushed Oreos directly to the base before freezing. This adds the cookies-and-cream flavor while the pint freezes.
Essential Kitchen Appliances
- Ninja Creami – I use the Ninja Creami to spin the frozen base into a smooth, creamy ice cream texture.
- Ninja Creami pint container – The pint holds the ice cream mixture while it freezes.
- Ninja Creami outer bowl – This holds the pint during the spinning process.
- Measuring cups and spoons – I use these to keep the milk, cream, syrup, and other ingredients accurate.
- Small spoon or spatula – This helps mix the cream cheese and protein powder into the liquid base.
- Mortar and pestle – I like using one when I want the Oreos crushed into small, uneven pieces.
- Freezer – The pint needs at least 24 hours to freeze completely before spinning.
How To Make Ninja Creami Oreo McFlurry Ice Cream At Home
Step 1 | Mix the Ice Cream Base
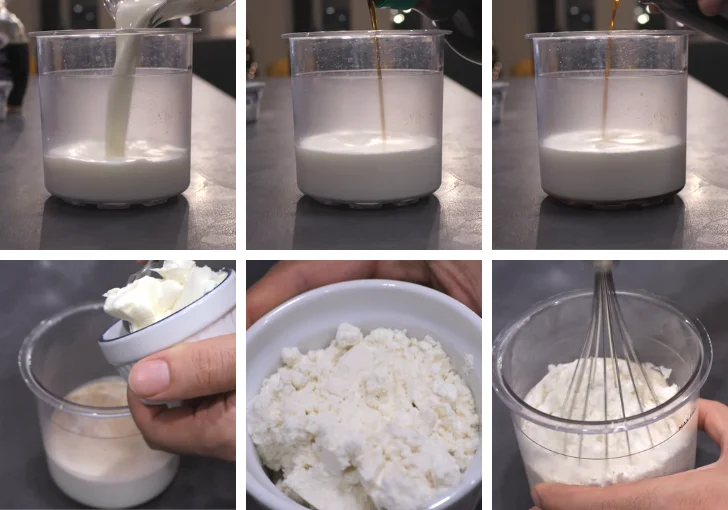
Start by adding 1 cup of milk to the Ninja Creami pint container. Pour in ¼ cup of heavy cream, then add 2 tablespoons of maple syrup and 1 teaspoon of vanilla extract. Add ⅛ teaspoon of salt, 2 tablespoons of cream cheese, and ¼ cup of cookies and cream protein powder.
Mix the ingredients very well. Pay close attention to the cream cheese and protein powder because both need to blend into the liquid. I like to stir until the base looks smooth and there are no large pieces of cream cheese left. A well-mixed base gives you a better frozen texture later.
If you are using vanilla protein powder instead, use ¼ cup vanilla protein powder. You can also crush 1–2 Oreos and mix them into the base before freezing. This gives the vanilla base a cookies-and-cream taste.
Step 2 | Freeze the Pint
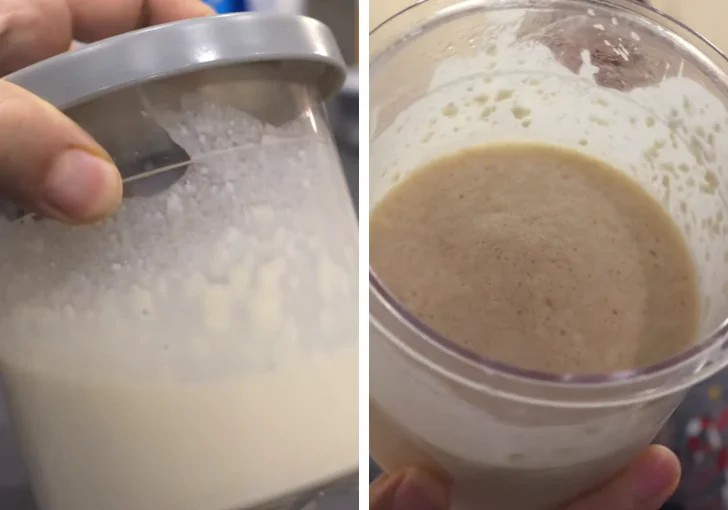
Place the lid firmly on the Ninja Creami pint. Put the pint in the freezer on a level surface. Freeze it for at least 24 hours.
This step matters more than it may seem. The base needs to be completely frozen before you process it. Keeping the pint level also helps create an even frozen surface. An uneven surface can make it harder for the Creami blade to move through the base properly.
I recommend giving the pint the full 24 hours instead of trying to rush it. Once the base is solid from top to bottom, it is ready for the next step.
Step 3 | Spin the Frozen Base
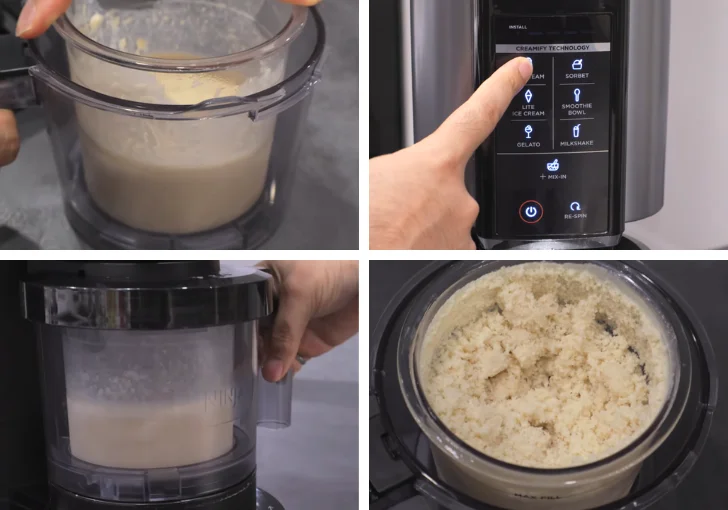
Take the frozen pint out of the freezer. Place it into the Ninja Creami outer bowl and secure everything according to the machine instructions.
Choose the Light Ice Cream setting and let the machine process the frozen base. When the first cycle ends, check the texture.
Do not worry if the ice cream looks dry, powdery, or crumbly after the first spin. That can happen with this type of frozen base. It does not mean the recipe failed. The next spin helps bring the texture together.
Step 4 | Re-Spin for a Creamy Texture
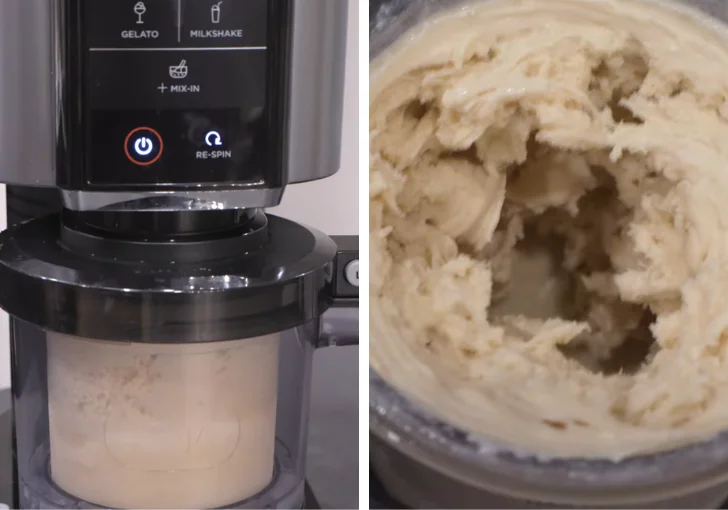
Place the pint back into the machine if needed and select the Re-Spin setting. Let the machine run another cycle.
After the Re-Spin, the base should look much smoother and creamier. I like this step because the texture changes quite a bit from the first spin. What looked dry before can turn into a thick soft-serve style mixture.
Check the texture before adding the Oreos. The ice cream should be thick enough to hold the cookie pieces. If the base still looks too dry, another Re-Spin can help bring it together.
Step 5 | Crush the Oreo Cookies
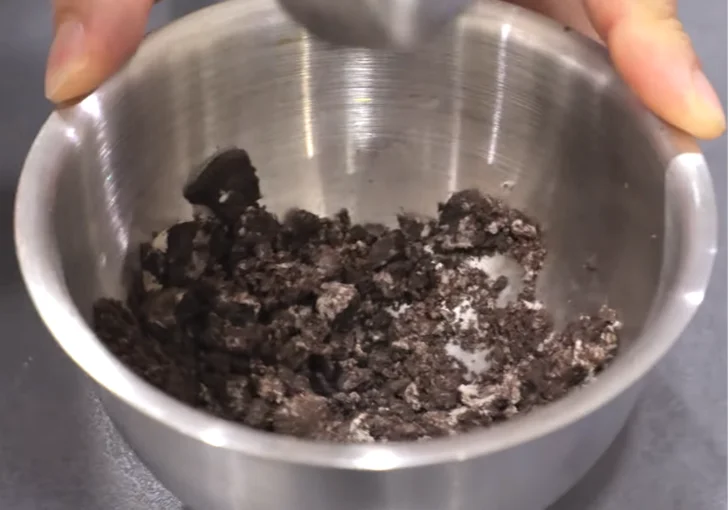
Take 2–3 Oreo cookies and crush them into small pieces. I prefer a mix of small crumbs and slightly larger pieces because it gives the ice cream more texture.
A mortar and pestle works well for crushing the cookies, but you can also place them in a small bag and gently crush them with a rolling pin or the bottom of a cup.
Try not to turn every cookie into fine crumbs. Larger pieces give you that classic Oreo bite that makes the McFlurry-style ice cream so good.
Step 6 | Add the Oreo Mix-In
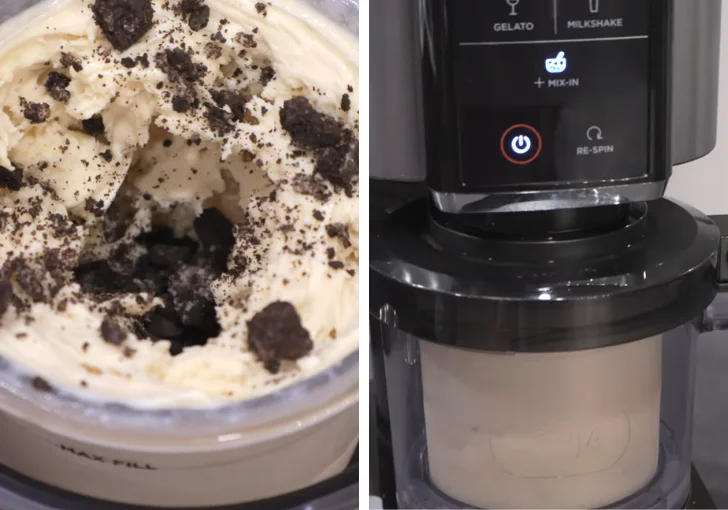
Make a small opening in the center of the spun ice cream. Add the crushed Oreo pieces into the opening.
Select the Mix-In setting and let the machine work the cookies through the ice cream. This spreads the Oreo pieces around the pint instead of leaving all the cookies in one spot.
I like using the Mix-In setting here because it keeps the cookie pieces noticeable. You get creamy ice cream along with little bites of Oreo in the same spoonful.
Step 7 | Add the Oreo Topping
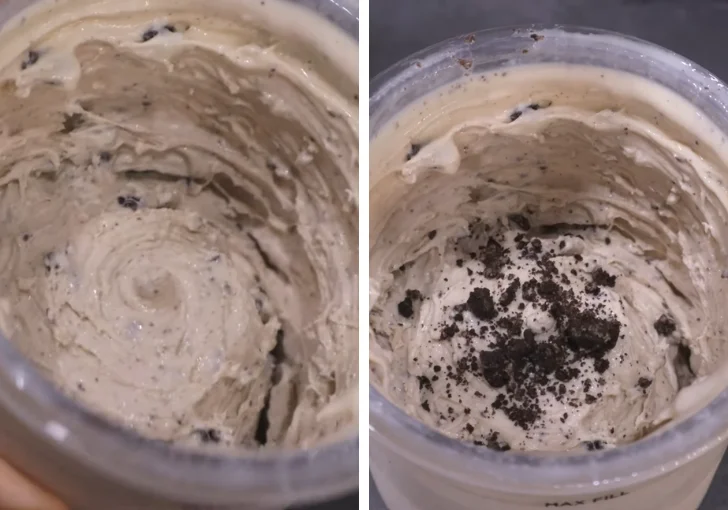
Once the Mix-In cycle is finished, check the ice cream. It should be thick, creamy, and packed with Oreo pieces.
Spoon the finished ice cream into a serving cup, or enjoy it straight from the Creami pint. Crush the remaining Oreo cookie and sprinkle it over the top.
I always save some cookie for the topping. It adds a nice crunch and makes the dessert look more like a classic Oreo McFlurry.
Step 8 | Serve
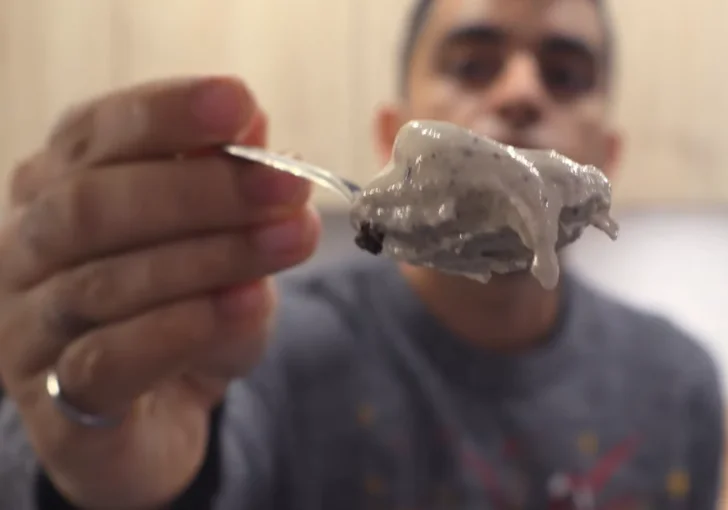
Serve the ice cream right after the Mix-In cycle for the best soft-serve style texture. The finished amount is close to a regular-sized McFlurry.
I like eating it right away while the texture is thick and creamy. If you want more Oreo flavor, add another small sprinkle of crushed cookie on top just before serving.
If you are using a Ninja Creami Deluxe, scale the recipe as needed but never fill the container above the MAX FILL line.
Easy Tips For The Best Ninja Creami Oreo McFlurry Ice Cream
Freeze the pint for the full 24 hours – A fully frozen base gives the Creami a solid starting point. I avoid spinning the pint early because the texture can turn out uneven.
Keep the pint level in the freezer – A level surface helps the base freeze evenly. I always place the pint on a flat freezer shelf instead of at an angle.
Do not panic after the first spin – The ice cream may look dry or crumbly at first. I use the Re-Spin setting to bring the base to a smoother texture.
Mix the cream cheese well – Small chunks of cream cheese can freeze into little bits. I make sure it blends into the milk before the pint goes into the freezer.
Do not crush every Oreo into dust – A few larger pieces make the finished ice cream more fun to eat. I like getting a little crunch in each bite.
Use Mix-In for the Oreos – The Mix-In setting spreads the cookie pieces through the ice cream. It works better than simply stirring the cookies into a hard frozen base.
Save one Oreo for the top – I keep a cookie aside for the topping. The extra crunch makes the final dessert feel more complete.
Creative Variations And Adaptations To Try
Use vanilla protein powder – If cookies and cream protein powder is not available, vanilla protein powder works well. Add 1–2 crushed Oreos to the base before freezing for extra cookie flavor.
Make it extra Oreo-heavy – Add a few more crushed Oreos during the Mix-In cycle if you love a strong cookie taste. Keep some larger pieces so the ice cream still has a good crunch.
Try chocolate sandwich cookies – You can replace the Oreos with another chocolate sandwich cookie. I like this option when I have a different brand in the pantry and want to use it up.
Add a chocolate drizzle – A small amount of chocolate syrup over the finished ice cream gives it a richer dessert taste. I keep the drizzle light so it does not cover the Oreo flavor.
Make a vanilla cookie version – Use vanilla protein powder and vanilla sandwich cookies instead of the cookies-and-cream powder. This makes a lighter cookie flavor while keeping the same creamy texture.
Most Common Mistakes That Can Ruin Ninja Creami Oreo McFlurry Ice Cream
Skipping the 24-hour freeze – I know it can be tempting to process the pint sooner, but a partly frozen base may not spin the way you want. Give it enough time to become solid.
Freezing the pint at an angle – An uneven frozen surface can make processing less consistent. I always place the pint flat so the base freezes as evenly as possible.
Not blending the cream cheese – Large pieces of cream cheese can stay in the mixture and freeze into small chunks. Mix the base until the cream cheese is fully worked in.
Adding all the Oreos before freezing – I prefer adding most of the cookies during the Mix-In step. This keeps the pieces more noticeable and gives the finished ice cream a better cookie texture.
Stopping after the first spin – The first spin can leave the ice cream looking dry or crumbly. A Re-Spin usually gives the base the smooth texture I want.
Crushing the Oreos too finely – Fine crumbs can disappear into the ice cream. I leave a few small chunks because they taste much better when you bite into them.
Overfilling the Ninja Creami Deluxe – If you scale up the recipe, never fill the pint above the MAX FILL line. Too much mixture can interfere with proper processing.
Creative Ways To Serve Ninja Creami Oreo McFlurry Ice Cream
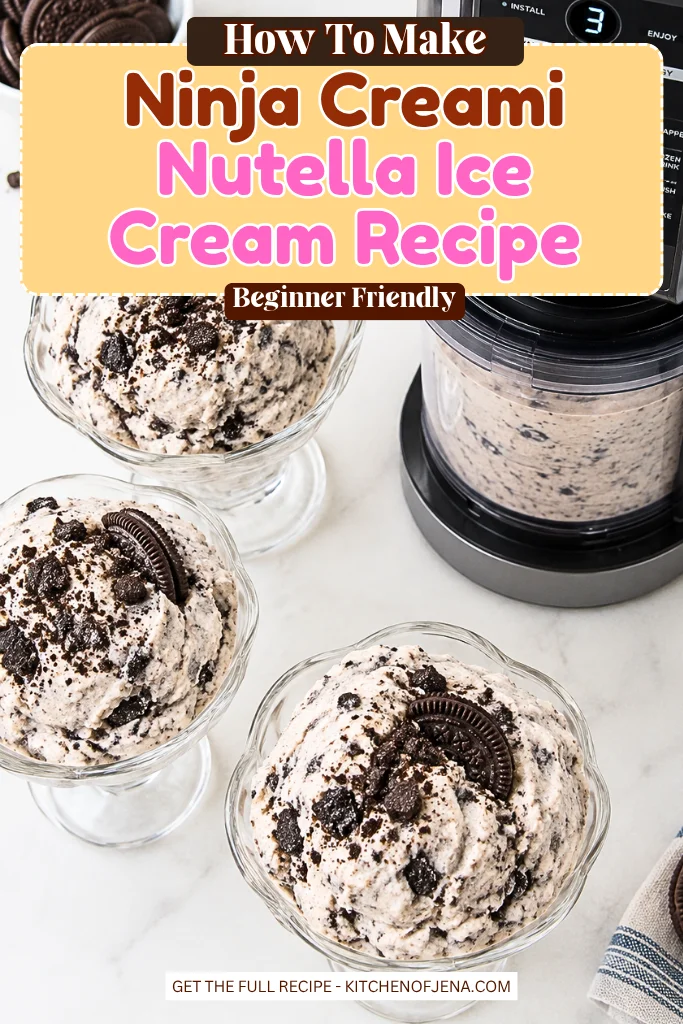
Classic McFlurry Cup – I spoon the ice cream into a clear cup and add crushed Oreos on top. It is simple, familiar, and lets the cookie pieces stand out.
Oreo Cookie Bowl – I serve a scoop in a small dessert bowl with extra Oreo crumbs around the edges. This gives each bite a little more cookie flavor.
Chocolate Drizzle – I add a thin chocolate drizzle over the top when I want a richer dessert. The chocolate pairs well with the vanilla base and Oreo pieces.
Oreo Sandwich Dessert – I serve the ice cream between two whole Oreos for a fun cookie sandwich. I like this when I want extra crunch with the creamy filling.
Fresh Fruit Side – I add a few sliced strawberries or bananas beside the ice cream. The fresh fruit gives a light contrast to the rich cookie flavor.
Simple After-Dinner Treat – I keep it easy and eat the ice cream straight from a small cup with one crushed Oreo on top.
Leftover Storage Tips
This Ninja Creami Oreo McFlurry is creamiest right after processing, but leftovers can be stored in the freezer for up to 1 week.
Cover the Ninja Creami pint tightly and freeze it. When you’re ready for another serving, process it again using the Re-Spin setting if it looks dry or crumbly. Add a few fresh Oreo pieces after spinning for the best crunch.
I like enjoying leftovers within a few days, while the cookies and creamy texture still taste fresh.
Ninja Creami Oreo McFlurry Ice Cream Recipe FAQs
Can I use regular milk instead of whole milk?
Yes, you can use regular milk in this recipe. Whole milk gives the ice cream a richer and creamier texture because it has more milk fat. Low-fat milk can also work, but the finished ice cream may feel a little lighter. I use whole milk when I want the closest rich texture.
Can I use vanilla protein powder instead of cookies and cream protein powder?
Yes. Use ¼ cup vanilla protein powder in place of the cookies and cream protein powder. Since vanilla powder does not bring the same cookie flavor, add 1–2 crushed Oreos directly to the base before freezing. You can then add more Oreos during the Mix-In step.
Why does my Ninja Creami Oreo McFlurry ice cream look crumbly after the first spin?
A crumbly first spin does not always mean something went wrong. Frozen Ninja Creami bases can look dry after the first cycle, especially when the base has a lower fat content. Use the Re-Spin setting to work the mixture again. The texture should become much smoother and creamier.
How long should I freeze the Ninja Creami pint?
Freeze the pint for at least 24 hours. The base needs to be completely frozen before processing. I also recommend freezing the pint on a level surface. This helps create an even frozen base and makes the processing step more consistent.
Can I add Oreos before freezing the pint?
You can add 1–2 crushed Oreos to the base if you are using vanilla protein powder and want cookie flavor throughout the frozen mixture. For the main recipe, I prefer adding the crushed Oreos during the Mix-In step. This keeps more of the cookie pieces noticeable in the finished ice cream.
Can I use more than four Oreos?
Yes, you can adjust the amount to match your taste. Four Oreos give the recipe a good balance between creamy ice cream and cookie pieces. If you want a stronger Oreo taste, add extra cookies during the Mix-In cycle and save a little for the topping.
Can I skip the heavy cream?
You can, but the texture may be different. Heavy cream adds richness and helps give the finished ice cream a fuller mouthfeel. If you leave it out, the ice cream may taste lighter and may not have the same creamy texture as the original recipe.
What should I do if the ice cream is still crumbly after the Re-Spin?
If the mixture still looks dry after one Re-Spin, run another Re-Spin cycle and check it again. Make sure the frozen base was solid before processing. The cream cheese, heavy cream, and milk also need to be mixed well before freezing for the best result.
Can I make this recipe without cream cheese?
You can leave out the cream cheese, but it helps give the base a thicker and creamier texture. Without it, the ice cream may have a lighter body. If you want the recipe to match the stated ingredients and texture as closely as possible, I recommend keeping the 2 tablespoons of cream cheese.
Can I add the Oreo topping before the Mix-In cycle?
I would keep the topping separate. Add the main crushed Oreo pieces during the Mix-In cycle so they spread through the ice cream. Save the final cookie for the top after processing. This gives you both Oreo pieces inside the ice cream and a fresh cookie crunch on top.
Why should I use the Light Ice Cream setting?
The Light Ice Cream setting is the setting used for this recipe because the frozen base is made with milk, heavy cream, protein powder, and other ingredients designed for this style of frozen dessert. Using the recommended setting helps you follow the intended preparation method.
Can I make the ice cream without maple syrup?
Maple syrup provides sweetness in the base, so removing it will change the taste. You can adjust the sweetener if needed, but keep in mind that changing the liquid ingredients can also affect the final texture. I recommend making the recipe as written first so you know how the original version tastes.
What is the best way to crush Oreos for this recipe?
I like using a mortar and pestle because I can control the size of the cookie pieces. A sealed bag and rolling pin also work. Try to make some small pieces and some larger pieces instead of crushing every Oreo into fine crumbs. The larger pieces give the ice cream a better bite.
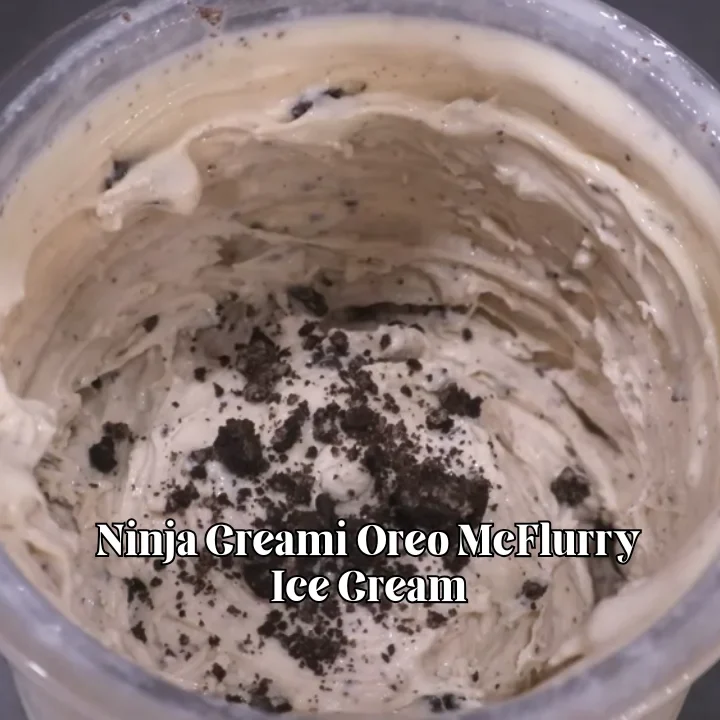
Ninja Creami Oreo McFlurry Ice Cream Recipe
This Ninja Creami Oreo McFlurry Ice Cream Recipe makes a thick, creamy cookie-filled treat with a smooth vanilla base and crunchy Oreo pieces. I use milk, heavy cream, cream cheese, maple syrup, and cookies and cream protein powder for a rich texture and extra flavor. The frozen base takes about 24 hours to freeze, then the Ninja Creami does the rest in just a few minutes. It’s an easy homemade Oreo McFlurry, cookies and cream ice cream, and Ninja Creami dessert for any sweet craving. Serve yours with extra crushed Oreos, chocolate syrup, or fresh whipped cream on top.
Instructions
- Start by adding 1 cup of milk to the Ninja Creami pint container. Pour in ¼ cup of heavy cream, then add 2 tablespoons of maple syrup and 1 teaspoon of vanilla extract. Add ⅛ teaspoon of salt, 2 tablespoons of cream cheese, and ¼ cup of cookies and cream protein powder. Mix everything very well until the cream cheese and protein powder are fully blended into the liquid. I like to stir until the base looks smooth and there are no large pieces of cream cheese left. A well-mixed base gives you a better frozen texture later. If you are using vanilla protein powder instead, use ¼ cup vanilla protein powder and add 1–2 crushed Oreos directly to the base before freezing. This gives the vanilla base a cookies-and-cream taste.
- Place the lid firmly on the Ninja Creami pint and put it in the freezer on a level surface. Freeze the mixture for at least 24 hours so the base becomes completely solid before processing. Keeping the pint level helps create an even frozen surface, which allows the Creami blade to work through the base more evenly. I recommend giving the pint the full 24 hours rather than trying to process it before it is fully frozen. Once the base is solid from top to bottom, it is ready for the next step.
- Take the frozen pint out of the freezer and place it into the Ninja Creami outer bowl. Secure everything according to the machine instructions, then select the Light Ice Cream setting and process the frozen base. When the first cycle finishes, check the texture. The ice cream may look dry, powdery, or crumbly after the first spin, but this is normal for a frozen base like this. Do not worry if it does not look creamy right away because the Re-Spin cycle will help bring the mixture together.
- Select the Re-Spin setting and process the ice cream again. After the Re-Spin, the base should become much smoother, thicker, and creamier. The texture can change quite a bit during this second cycle, turning the dry-looking mixture from the first spin into a thick soft-serve style ice cream. Check the consistency before adding the Oreos. If the base still looks too dry, run another Re-Spin until the ice cream reaches a smooth and creamy texture.
- Take 2–3 Oreo cookies and crush them into small pieces. A mix of fine crumbs and slightly larger pieces works best because it gives the ice cream both Oreo flavor and texture. A mortar and pestle is a good option for crushing the cookies, but you can also place the Oreos in a small bag and gently crush them with a rolling pin or the bottom of a cup. Avoid crushing every piece into fine crumbs because larger cookie pieces give you a better Oreo bite in the finished ice cream.
- Make a small opening in the center of the spun ice cream and add the crushed Oreo pieces. Select the Mix-In setting and let the machine work the cookies through the ice cream. This helps distribute the Oreo pieces throughout the pint instead of leaving them in one spot. The Mix-In cycle also keeps the cookie pieces noticeable, so you get creamy ice cream with small bites of Oreo throughout each spoonful.
- Once the Mix-In cycle finishes, check the ice cream to make sure it is thick, creamy, and evenly mixed with the Oreo pieces. Spoon the finished ice cream into a serving cup, or enjoy it directly from the Creami pint. Crush the remaining Oreo cookie and sprinkle it over the top for extra cookie flavor and crunch. Saving some crushed Oreo for the topping also gives the finished McFlurry-style ice cream a classic cookies-and-cream look.
- Serve the ice cream right after the Mix-In cycle for the best thick and soft-serve style texture. The finished amount should be close to the size of a regular McFlurry. I like serving it immediately while the ice cream is at its creamiest, with an extra sprinkle of crushed Oreo on top. If you are using a Ninja Creami Deluxe, you can scale the recipe as needed, but make sure the mixture never goes above the MAX FILL line.
This Ninja Creami Oreo McFlurry Ice Cream Recipe is a simple way to make a thick, creamy Oreo treat at home. I love the mix of smooth vanilla flavor, rich cream, and crunchy cookie pieces. The Re-Spin step is worth doing, and saving one Oreo for the topping makes the final cup even better. I hope you give this recipe a try and make it your own. Share your cooking experience with us, and don’t forget to follow us on Pinterest for more homemade recipes.