Ninja Creami Tiramisu Ice Cream Recipe (dream dessert)
There are days when I want tiramisu, but I don’t really want to make a whole pan of it. I want the coffee, the chocolate, the soft ladyfingers, and that creamy filling—but straight from the freezer with a spoon.
That was the idea behind this Ninja Creami Tiramisu Ice Cream Recipe.
I played around with the layers because simply blending everything together didn’t give me the tiramisu flavor I was after.
The coffee-soaked ladyfingers stay at the bottom, while a rich cream cheese gelato sits on top.
I also found that very thin layers of dark chocolate work much better than a thick chocolate layer.
They break into little pieces when the Ninja Creami spins instead of leaving you with big frozen chunks.
Today, I’m sharing exactly how I make this tiramisu ice cream using my Ninja Creami machine, including the small steps that make a difference in the final texture. It’s cold, creamy, coffee-rich, and a little messy in the best way.
If you love tiramisu and coffee ice cream, this one feels like a fun excuse to have both.
Ninja Creami Tiramisu Ice Cream Ingredients
12 ladyfingers
I used 12 ladyfingers for the bottom layer. They soak up the sweet coffee and turn soft enough to blend into each spoonful.
430–450 ml brewed espresso or strong coffee
I used strong coffee so the tiramisu flavor stands out. Plain coffee can freeze very hard, so the sweetener helps with the texture too.
5 tablespoons allulose/erythritol blend
I used an allulose and erythritol blend to sweeten the coffee. The sugar substitute also helps keep the frozen coffee softer.
244 g full-fat cream cheese
I used full-fat cream cheese for a rich, smooth base. It gives the upper layer a cheesecake-like taste that works really well with coffee.
540 g milk, preferably 2% milk
I used 2% milk to keep the gelato creamy without making it too heavy. It also helps loosen the cream cheese as it heats.
80 g xylitol
I used xylitol to sweeten the cream cheese base. It adds sweetness while helping give the frozen mixture a softer texture.
35 g skim milk powder
I added skim milk powder to give the base more milk flavor and body. It helps the finished gelato feel thicker and creamier.
3–4 g hot-process ice cream stabilizer
I used a hot-process stabilizer because the base is heated to 85°C. It helps the cream cheese mixture stay smooth after freezing.
1 teaspoon vanilla bean paste
I like vanilla bean paste here because it gives the cream cheese layer a warm vanilla taste that goes well with coffee and chocolate.
50 g 60% dark chocolate
I used 60% dark chocolate for the thin layers. It adds a deep chocolate taste without making the dessert too sweet.
1 teaspoon refined/deodorized coconut oil
I mixed a little refined coconut oil with the chocolate. It helps the chocolate spread into a very thin layer and set quickly over the frozen base.
Essential Kitchen Appliances
- Ninja Creami Deluxe
- Ninja Creami Deluxe container
- Blender or hand mixer
- Small saucepan
- Digital kitchen thermometer
- Microwave-safe bowl
- Microwave
- Silicone spatula
- Kitchen scale
- Measuring spoons
- Refrigerator
- Freezer
How To Make Ninja Creami Tiramisu Ice Cream At Home
Step 1 | Brew and Sweeten the Coffee
Prepare about 430–450 ml of espresso or strong coffee. The amount can be made with four Longo shots, since the first three shots may give only around 320 ml and the extra shot brings the total closer to the needed amount.
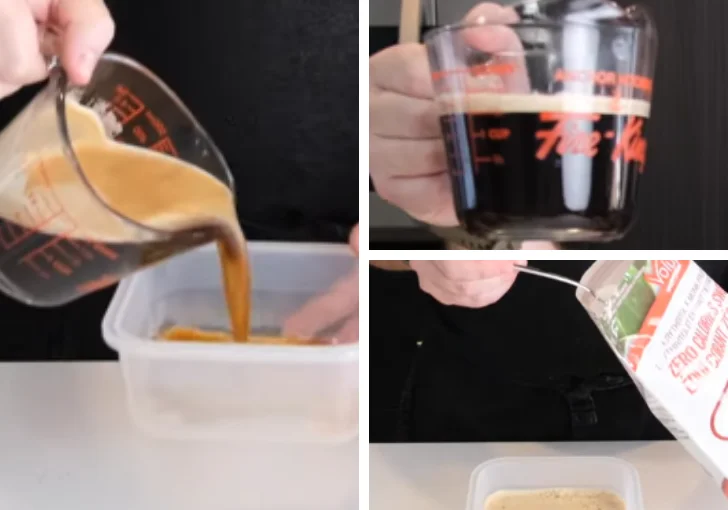
While the coffee is still warm, stir in 5 tablespoons of the allulose/erythritol blend. Keep stirring until the sweetener fully dissolves. Set the coffee aside and let it cool while you get the ladyfingers ready.
Step 2 | Soak the Ladyfingers
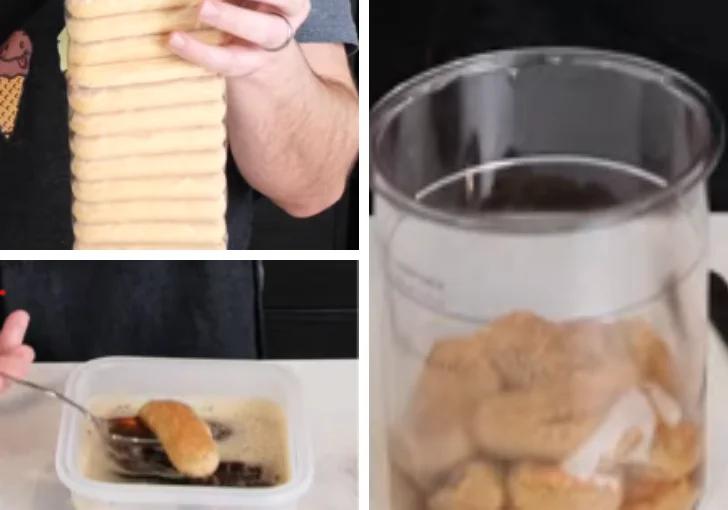
Place the 12 ladyfingers into the sweetened coffee one at a time. Let each one soak well so the coffee reaches the center. The ladyfingers should become very soft and lose some of their original shape.
Do not leave dry spots in the middle because the coffee flavor needs to reach the whole sponge. Arrange the soaked ladyfingers across the bottom of the Ninja Creami Deluxe container.
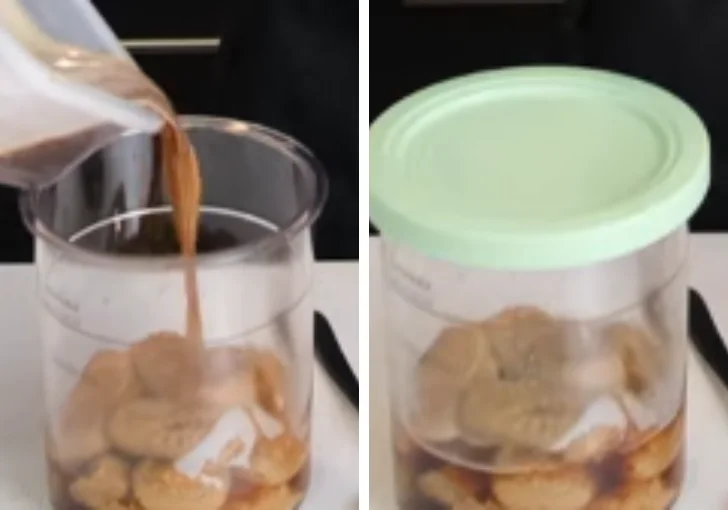
Make the layer as even as you can. Pour some of the remaining coffee over the ladyfingers so extra coffee sits around the bottom layer.
Step 3 | Freeze the Coffee and Ladyfinger Layer
Place the container in the freezer for a few hours. The coffee and ladyfingers need to become very cold before you add the first chocolate layer. Keep the container sitting level in the freezer so the coffee layer stays even. A firm frozen surface makes the chocolate much easier to spread.
There is no need to freeze the entire dessert at this stage. The main goal is to make the bottom layer cold enough for the melted chocolate to set almost as soon as it touches the surface.
Step 4 | Prepare the Cream Cheese Gelato Base
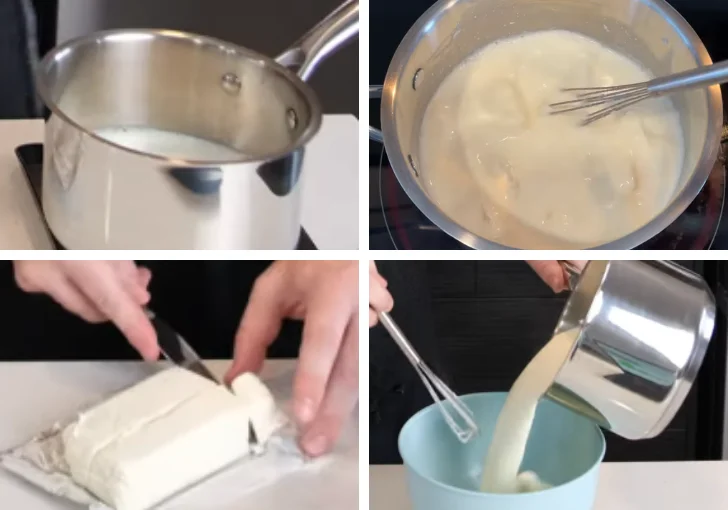
Add 540 g milk and 244 g full-fat cream cheese to a saucepan. Cut the cream cheese into smaller pieces first so it melts more easily into the milk. Add 80 g xylitol and 35 g skim milk powder. Stir the mixture as it heats over the stovetop.
Keep the heat gradual and continue stirring so the cream cheese melts and the milk mixture stays smooth. Heat the base until it reaches 85°C (185°F). This temperature is important because the recipe uses a hot-process ice cream stabilizer.
Step 5 | Add the Stabilizer and Vanilla
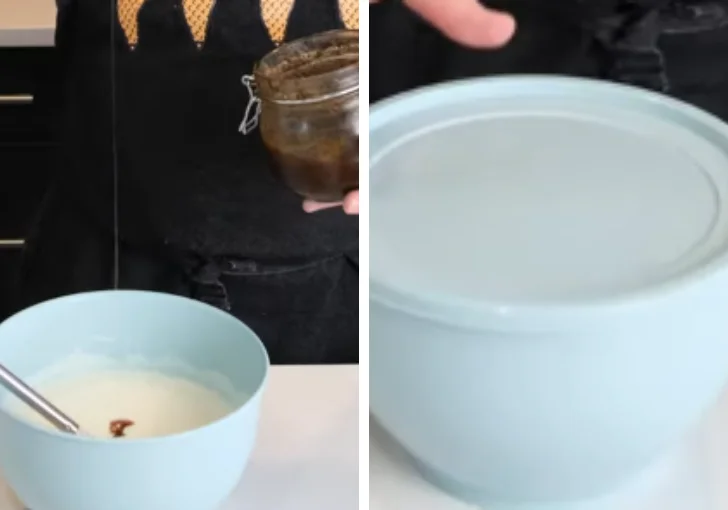
Once the cream cheese mixture reaches 85°C (185°F), add 3–4 g hot-process ice cream stabilizer. Keep mixing until the stabilizer is fully worked into the hot base. The mixture should become smooth and fairly thick. If you use xanthan gum instead, use much less than the amount of hot-process stabilizer because too much xanthan gum can make the base extremely gummy.
Once the mixture is smooth, stir in 1 teaspoon vanilla bean paste. The finished base should have a thick, pudding-like texture. That thicker texture is normal because of the amount of cream cheese in the recipe.
Step 6 | Chill the Cream Cheese Base
Transfer the cream cheese gelato base to the refrigerator and let it chill for about 1–2 hours. The base should be cold before you start layering the dessert. Adding a warm cream cheese mixture over chocolate can soften the chocolate and cause the layers to mix together.
Chilling also makes the base easier to handle when you pour it over the frozen coffee and ladyfinger layer. Give the mixture a quick stir before using it if it has thickened more in the refrigerator.
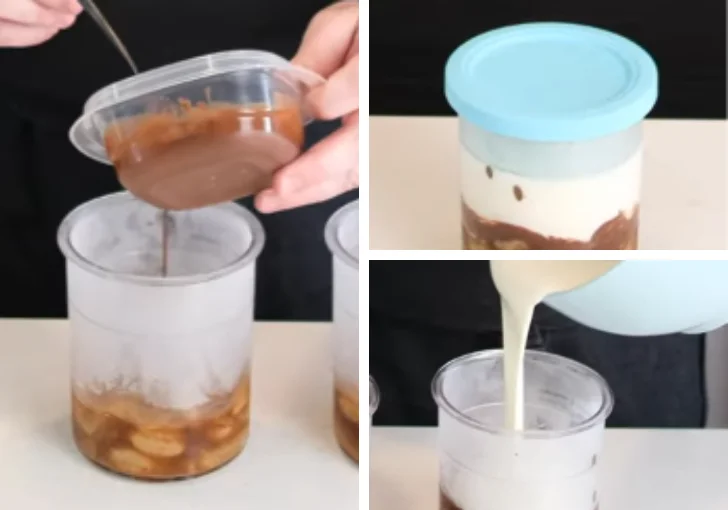
Step 7 | Melt the Dark Chocolate
Add 50 g of 60% dark chocolate and 1 teaspoon refined/deodorized coconut oil to a microwave-safe bowl. Heat the mixture in short bursts, stirring between each one. Continue until the chocolate becomes smooth and fully melted. Do not make the chocolate very hot.
You want it melted enough to spread, but easy to work with. The coconut oil helps the chocolate form a thin layer that becomes firm when it touches the frozen surface.
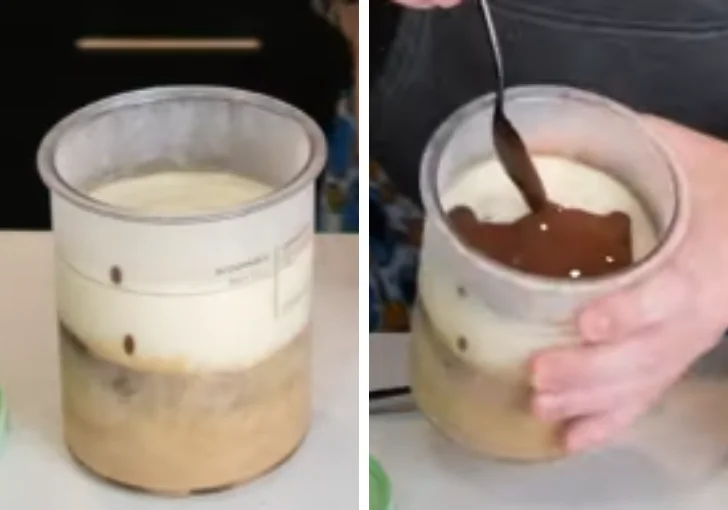
Step 8 | Add the First Chocolate Layer
Take the frozen coffee and ladyfinger base from the freezer. Spread a very thin layer of melted chocolate over the frozen surface. Work fairly quickly because the cold coffee layer will make the chocolate set fast. Use a silicone spatula to gently spread the chocolate across the surface.
Keep the layer thin and even. You do not need a thick blanket of chocolate. This first chocolate layer helps separate the coffee-soaked ladyfingers from the cream cheese gelato above it.
Step 9 | Add the Cream Cheese Gelato Layer
Pour the chilled cream cheese gelato mixture over the hardened chocolate layer. Pour slowly so the chocolate stays in place. Use a spatula to gently level the surface. Try not to press too hard because you do not want to disturb the chocolate underneath.
Once the top looks even, place the container back in the freezer. Freeze the cream cheese layer completely before adding the second chocolate layer. A solid layer gives you a much cleaner finish.
Step 10 | Add the Final Chocolate Layer
After the cream cheese gelato layer is frozen solid, check the remaining chocolate. If it has become too firm, gently melt or soften it again. Spread another very thin layer of chocolate over the frozen cream cheese layer. Keep this layer especially thin because it will break apart during the Ninja Creami spin.
Those small broken pieces become chocolate flecks through the upper part of the dessert. Spread it quickly and evenly, then get the container ready for the final freeze.
Step 11 | Freeze the Complete Tiramisu Ice Cream
Place the Ninja Creami Deluxe container back into the freezer and let the complete dessert freeze until solid. Since this recipe has several frozen layers, the container needs to be fully frozen before processing. Keep it level in the freezer.
A level container helps the layers stay even and lets the Ninja Creami process the mixture properly. Do not rush this part. A properly frozen pint gives a much better texture during the final spin.
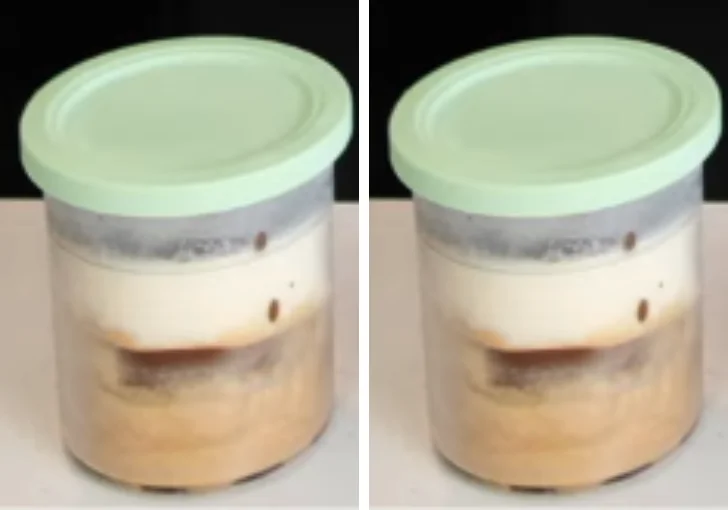
Step 12 | Spin on Light Ice Cream
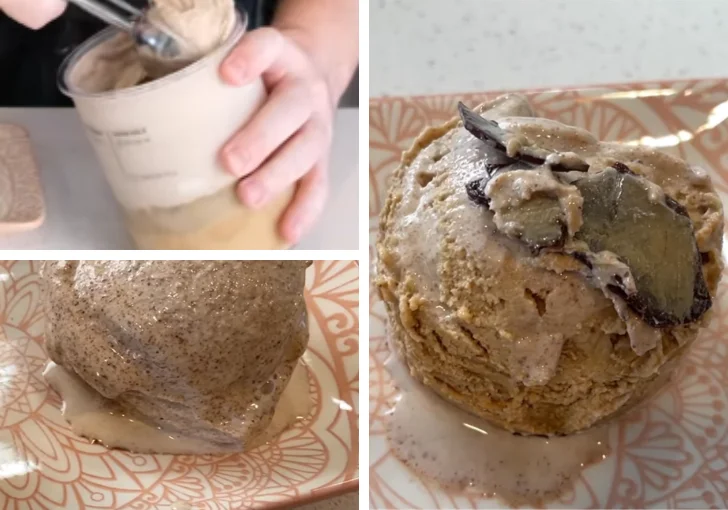
Place the frozen container into the Ninja Creami Deluxe and select the Light Ice Cream setting. Start the program and let the machine process the frozen dessert. The spin breaks the thin chocolate layer into small pieces while turning the cream cheese layer into a smooth, scoopable gelato-style texture.
The coffee-soaked ladyfinger layer stays underneath, so you get a clear change in texture from the top to the bottom. If the texture needs a little more processing, follow your Ninja Creami’s normal re-spin option.
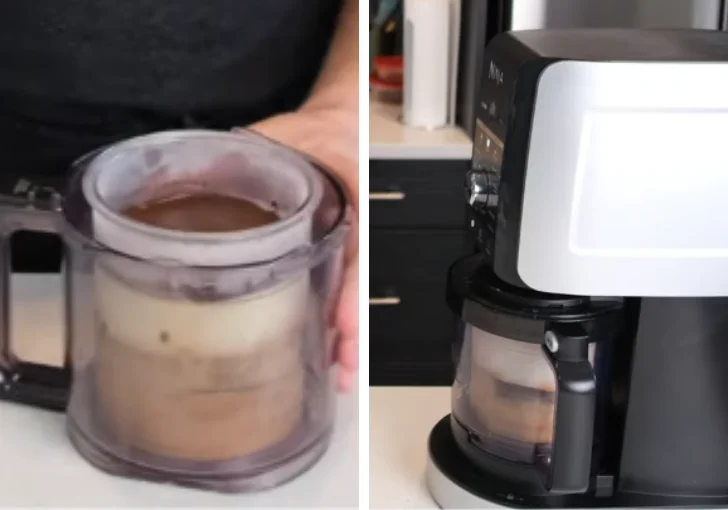
Step 13 | Serve the Two Layers Together
Scoop down into the container instead of only taking the top layer. This lets each serving include some creamy cream cheese gelato, chocolate flecks, and the coffee-rich ladyfinger layer. The upper section has a smooth cheesecake-like flavor with bits of chocolate, while the bottom has a stronger coffee taste and a softer, slightly sorbet-like texture from the soaked ladyfingers.
I really like getting both layers in the same spoonful because it gives the dessert more of that tiramisu feel.
Easy Tips For The Best Ninja Creami Tiramisu Ice Cream
Use strong coffee – I like strong espresso or coffee here because milk and cream cheese can soften the coffee taste. A weak brew will make the finished dessert taste flat.
Sweeten the coffee while warm – The allulose/erythritol blend dissolves much easier in warm coffee. This also helps the coffee layer freeze with a better texture.
Keep the chocolate layers very thin – Thin chocolate breaks into small pieces during the Ninja Creami spin. A thick layer can turn into larger hard chunks.
Chill the cream cheese base first – I always let the cooked base cool fully before layering. A warm base can soften the frozen chocolate and make the layers messy.
Use a thermometer for 85°C – The hot-process stabilizer needs the base to reach the right temperature. A kitchen thermometer makes this much easier to control.
Do not overuse xanthan gum – If you replace the stabilizer with xanthan gum, use a much smaller amount. Too much can make the gelato thick and gummy.
Freeze the layers level – Keep the container flat in the freezer. This gives you more even layers and makes the final dessert easier to scoop.
Creative Variations And Adaptations To Try
Use espresso for a stronger coffee taste – I prefer espresso when I want the coffee flavor to stand out more. It gives the bottom layer a deeper taste that works especially well with the dark chocolate.
Try a different dark chocolate – You can use chocolate with a higher cocoa percentage for a less sweet finish. I like 60% dark chocolate because it gives enough bitterness without taking over the dessert.
Add extra vanilla – If you love a stronger vanilla flavor, add a little more vanilla bean paste to the cream cheese base. I would keep it close to 1½ teaspoons so the coffee flavor still comes through.
Make the coffee layer softer – Keep the sweetener amount close to the recipe instead of cutting it too much. The sugar substitute helps the coffee layer stay softer after freezing, which makes it easier to scoop.
Add a light cocoa finish – For a simple tiramisu-style touch, dust a small amount of unsweetened cocoa powder over the serving. I like this when I want extra chocolate flavor without adding another thick layer.
The Most Common Mistakes That Can Ruin Ninja Creami Tiramisu Ice Cream
Using plain unsweetened coffee – Coffee by itself can freeze very hard. The result can feel icy and difficult to scoop, so the sweetener in the coffee layer matters for both taste and texture.
Making the chocolate layer too thick – A thick chocolate layer can turn into big hard pieces after freezing. I keep mine very thin so the Creami breaks it into small chocolate flecks.
Skipping the 85°C temperature – The hot-process stabilizer needs proper heat to work. If the base never reaches about 85°C (185°F), the finished cream cheese layer may not have the texture you expect.
Adding warm gelato base to the frozen layer – Warm cream cheese mixture can melt the chocolate and disturb the coffee layer. I always chill the base for about 1–2 hours before layering it.
Using too much xanthan gum – Too much xanthan gum can make the mixture feel gummy instead of creamy. If using it as a replacement, a very small amount is enough.
Not freezing the container solid – The Ninja Creami works best when the dessert is properly frozen. If the center is still soft, the layers may not process evenly.
Only scooping the top layer – The best part is getting the two textures together. Scoop down through the container so you get cream cheese gelato, chocolate flecks, and coffee-soaked ladyfingers.
Creative Ways To Serve Ninja Creami Tiramisu Ice Cream
Serve it in a chilled glass – I like using a small chilled glass because the creamy layers look nice against the sides and the dessert stays cold longer.
Add a light cocoa dusting – I sometimes add a small dusting of unsweetened cocoa powder on top. It gives the scoop a simple tiramisu look without changing the texture.
Serve with extra espresso – I like a small shot of espresso on the side when I want a stronger coffee taste. The hot coffee gives a nice contrast to the cold gelato.
Add a few chocolate shavings – A few thin dark chocolate shavings make the serving look finished. I keep the amount small because the recipe already has chocolate flecks inside.
Serve with one ladyfinger – I like adding one dry ladyfinger beside the scoop. It gives you a little crunch against the soft coffee-soaked layer.
Make small dessert cups – I use small cups when serving several people. Each cup can have a scoop from the top and bottom so both layers show up together.
Leftover Storage Tips
I keep leftover Ninja Creami Tiramisu Ice Cream in the Ninja Creami Deluxe container with the lid on tightly. Return it to the freezer as soon as possible after serving.
Since the dessert contains coffee, cream cheese, ladyfingers, and chocolate layers, it is best kept frozen rather than sitting out for a long time.
After refreezing, the texture can become firmer than it was after the first spin. Let the container sit for a few minutes before scooping, then use the Ninja Creami re-spin setting if needed.
Ninja Creami Tiramisu Ice Cream Recipe FAQs
Can I use regular coffee instead of espresso for Ninja Creami Tiramisu Ice Cream?
Yes, you can use strong brewed coffee instead of espresso. The main thing is making sure the coffee has enough flavor to stand up to the milk, cream cheese, chocolate, and ladyfingers. I would avoid weak coffee because the finished dessert may lose that classic tiramisu taste. Use about 430–450 ml of strong coffee for the recipe.
Why does the coffee layer need a sugar substitute?
The sugar substitute does more than add sweetness. It also helps lower the freezing point of the coffee mixture. Plain coffee can freeze very hard and turn icy. Using 5 tablespoons of the allulose/erythritol blend gives the coffee layer a softer frozen texture. This makes the bottom layer easier to scoop and eat with the cream cheese gelato.
Can I use whole milk instead of 2% milk?
Yes, whole milk can be used in the cream cheese gelato base. It will give the upper layer a richer and heavier milk taste. The recipe calls for 540 g milk, preferably 2%, because it gives a nice balance with the full-fat cream cheese. If you use whole milk, expect a slightly richer finished texture.
Can I use low-fat cream cheese in this Ninja Creami Tiramisu Ice Cream Recipe?
You can, but the texture and taste will change. Full-fat cream cheese gives the recipe its rich, smooth feel and strong cheesecake-like flavor. Low-fat cream cheese contains less fat, so the finished gelato may feel lighter and less creamy. For the closest result to this recipe, I recommend using the full-fat cream cheese amount listed.
Do I have to use a hot-process ice cream stabilizer?
The recipe is designed around a hot-process stabilizer, so it is the best choice for the listed method. The base is heated to 85°C (185°F) before the stabilizer is added. If you use xanthan gum instead, do not use the same amount. Xanthan gum is much stronger in small amounts, and too much can make the base very gummy.
Why does the cream cheese base need to reach 85°C?
The base reaches 85°C (185°F) because the recipe uses a hot-process ice cream stabilizer. The heat allows the stabilizer to work properly in the milk and cream cheese mixture. It also helps the ingredients come together into a smooth base. I use a digital thermometer for this step because it is much easier than trying to guess the temperature.
Can I skip freezing the coffee and ladyfinger layer first?
I would not skip it. The bottom layer needs to become very cold before you add the melted chocolate. The chocolate sets almost right away when it touches the frozen surface, which helps create a clean separation between the coffee-soaked ladyfingers and cream cheese layer. If the bottom is too warm, the chocolate can melt into it instead of forming a thin layer.
Why do the chocolate layers need to be so thin?
The thin chocolate layers are made to work with the Ninja Creami spin. The first layer acts as a divider between the coffee and cream cheese sections. The second layer breaks into small pieces during processing and creates chocolate flecks in the upper layer. If the chocolate is too thick, it can stay in larger hard chunks and make the dessert less pleasant to scoop.
What setting should I use on the Ninja Creami Deluxe?
For this recipe, use the Light Ice Cream setting on the Ninja Creami Deluxe. The setting processes the frozen cream cheese layer into a smooth gelato-style texture while breaking the top chocolate layer into smaller pieces. Because this dessert has several frozen layers, make sure the container is completely frozen before processing it.
Why is the bottom layer softer and different from the top?
The two layers have different ingredients, so they naturally have different textures. The upper section contains cream cheese, milk, skim milk powder, and stabilizer, giving it a smooth and rich gelato texture. The bottom contains coffee and soaked ladyfingers, which can have a softer, slightly sorbet-like feel after processing. I actually like this difference because it makes each spoonful more interesting.
Can I make the Ninja Creami Tiramisu Ice Cream ahead of time?
Yes, this dessert is a good one to prepare ahead because the layers need time to freeze. You can prepare the coffee and ladyfinger layer, freeze it, make and chill the cream cheese base, then finish the chocolate layers and freeze the full container. Keep it covered in the freezer until you are ready to process and serve it.
How should I get the best texture after refreezing leftovers?
After the first serving, the leftover dessert can become harder as it freezes again. Let the container sit out for a few minutes so the surface is not as hard. Then process it again with the appropriate Ninja Creami setting if needed. Avoid leaving the container out for a long time. The goal is to soften it just enough for the machine to work well.
Ninja Creami Tiramisu Ice Cream Recipe
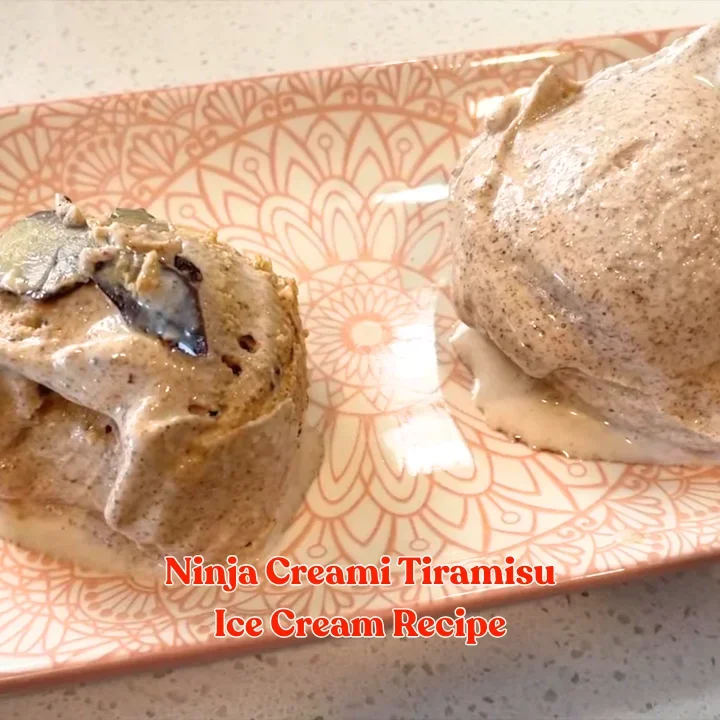
This Ninja Creami Tiramisu Ice Cream Recipe turns coffee-soaked ladyfingers, cream cheese, vanilla, and dark chocolate into a rich frozen dessert with two tasty layers. I love how the strong coffee flavor comes through while the creamy top stays smooth after the Ninja Creami spin. The recipe takes about 30 minutes of active prep, plus freezing and chilling time, and is easy to make with a little planning. It is a fun homemade tiramisu ice cream recipe for coffee and chocolate lovers. Serve it with cocoa powder, extra chocolate shavings, or a ladyfinger so you can enjoy every layer.
Ingredients
- 12 ladyfingers
- 430–450 ml brewed espresso or strong coffee
- 5 tablespoons allulose/erythritol blend
- 244g full-fat cream cheese
- 540g milk, preferably 2% milk
- 80g xylitol
- 35g skim milk powder
- 3–4g hot-process ice cream stabilizer
- 1 teaspoon vanilla bean paste
- 50 g 60% dark chocolate
- 1 teaspoon refined/deodorized coconut oil
Instructions
- Prepare about 430–450 ml of espresso or strong coffee. The transcript reaches this amount with four Longo shots, although the first three shots produced around 320 ml and an additional shot was needed. While the coffee is still warm, stir in 5 tablespoons of the allulose/erythritol blend until completely dissolved. Set the coffee aside while preparing the ladyfingers.
- Place the 12 ladyfingers into the sweetened coffee one at a time. Soak each one thoroughly, allowing the coffee to penetrate the sponge without leaving dry centers. The ladyfingers will become very soft and begin losing their structure as they absorb the coffee. Arrange the soaked ladyfingers across the bottom of the Ninja Creami Deluxe container, creating an even bottom layer. Pour some of the remaining coffee over the ladyfingers so there is additional coffee in the bottom of the container.
- Place the container with the coffee-soaked ladyfingers in the freezer for a few hours. The goal is to get the bottom layer very cold before adding the chocolate because the chocolate needs to set quickly when it touches the frozen coffee mixture. Keep the container level while freezing so the bottom layer stays as even as possible.
- Add 540 g milk and 244 g full-fat cream cheese to a saucepan. Cut the cream cheese into slightly smaller pieces first so it melts more easily. Add 80 g xylitol and 35 g skim milk powder, then mix everything together. Heat the mixture gradually on the stovetop while stirring until it reaches 85°C (185°F), which is the temperature needed for the hot-process stabilizer.
- Once the mixture reaches 85°C (185°F), add 3–4 g hot-process ice cream stabilizer and continue mixing until it is fully incorporated. If using xanthan gum instead, the transcript warns that much less should be used because too much can make the mixture extremely gummy. Once the base is smooth and thick, stir in 1 teaspoon vanilla bean paste. The finished mixture will be fairly thick because of the high amount of cream cheese, and a pudding-like texture is expected.
- Transfer the cream cheese gelato base to the refrigerator and chill it for about 1–2 hours. The base needs to become cold before layering because a warm mixture could melt the chocolate layer. Chilling it first also helps keep the separate layers from blending together during assembly.
- Combine 50 g of 60% dark chocolate with 1 teaspoon refined/deodorized coconut oil. Melt the mixture in the microwave until smooth, stirring as needed. The coconut oil helps create a thin chocolate layer that can harden over the frozen base.
- Take the frozen coffee and ladyfinger base from the freezer. Spread a very thin layer of melted chocolate directly over the frozen ladyfinger layer. Work fairly quickly because the cold base will cause the chocolate to set almost immediately. Cover the surface evenly without making the chocolate layer too thick.
- Pour the chilled cream cheese gelato mixture over the hardened chocolate layer. Spread it gently so the top is as level as possible. Place the container back in the freezer and allow the cream cheese layer to freeze completely before adding the final chocolate layer.
- Once the cream cheese gelato layer is frozen solid, melt or soften the remaining chocolate mixture if necessary and spread another very thin layer of chocolate over the top. Keep this layer thin because it will break apart during the Ninja Creami spin and create chocolate flecks throughout the cream cheese portion.
- Return the Ninja Creami Deluxe container to the freezer and freeze the completed dessert until solid. The transcript specifically uses the Ninja Creami Deluxe Light Ice Cream setting for the final spin. Because the dessert contains multiple frozen layers, make sure the container is properly frozen before processing.
- Place the frozen container into the Ninja Creami Deluxe and process it using the Light Ice Cream setting. The spin breaks the top chocolate layer into small pieces while turning the cream cheese layer into a smooth, scoopable gelato-style ice cream. The coffee-soaked ladyfinger layer remains underneath, giving the finished dessert two distinct textures and flavors.
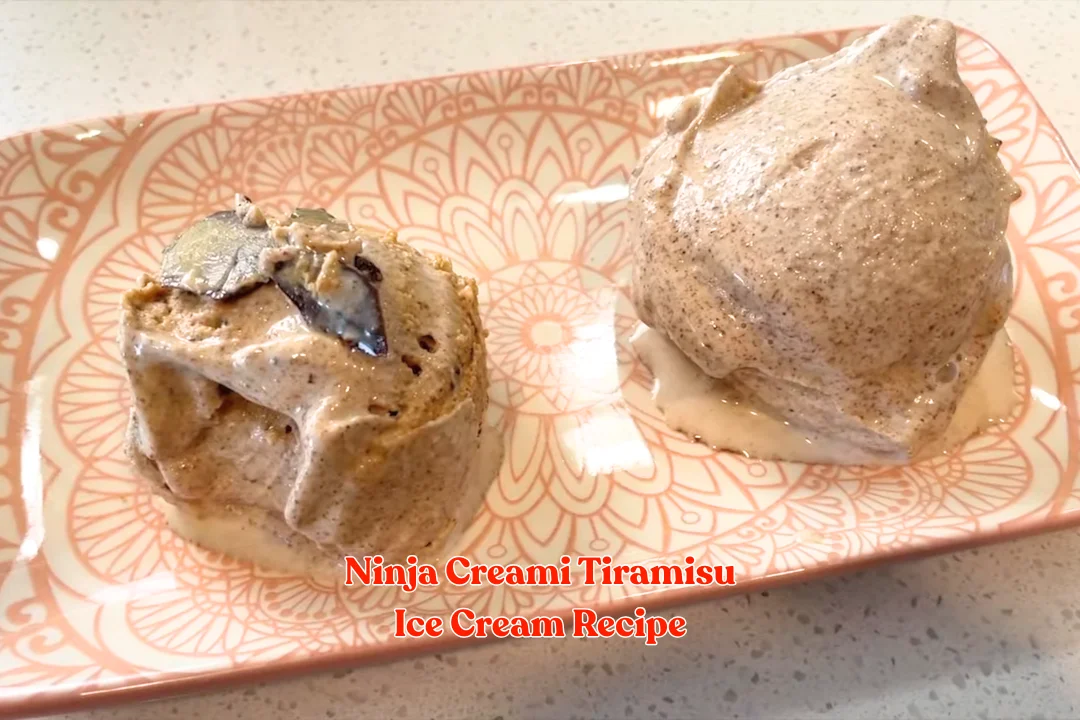
- Scoop through the container so each serving can include some of the cream cheese ice cream, chocolate pieces, and coffee-rich ladyfinger layer underneath. The top has a creamy cheesecake-like flavor with chocolate flecks, while the bottom is much richer in coffee and has a softer, slightly sorbet-like texture from the coffee-soaked ladyfingers. The chocolate between the layers helps keep the two sections distinct.
Nutrition Information:
Amount Per Serving: Calories: 355Total Fat: 20gSaturated Fat: 11gCholesterol: 65mgSodium: 250mgCarbohydrates: 45gFiber: 2gSugar: 13gProtein: 10g
This Ninja Creami Tiramisu Ice Cream Recipe gives you a fun way to enjoy the flavors of tiramisu in a cold, creamy dessert. I love the mix of strong coffee, soft ladyfingers, rich cream cheese, vanilla, and little chocolate flecks.
The layers take some extra steps, but the final scoop feels special and tastes so good.