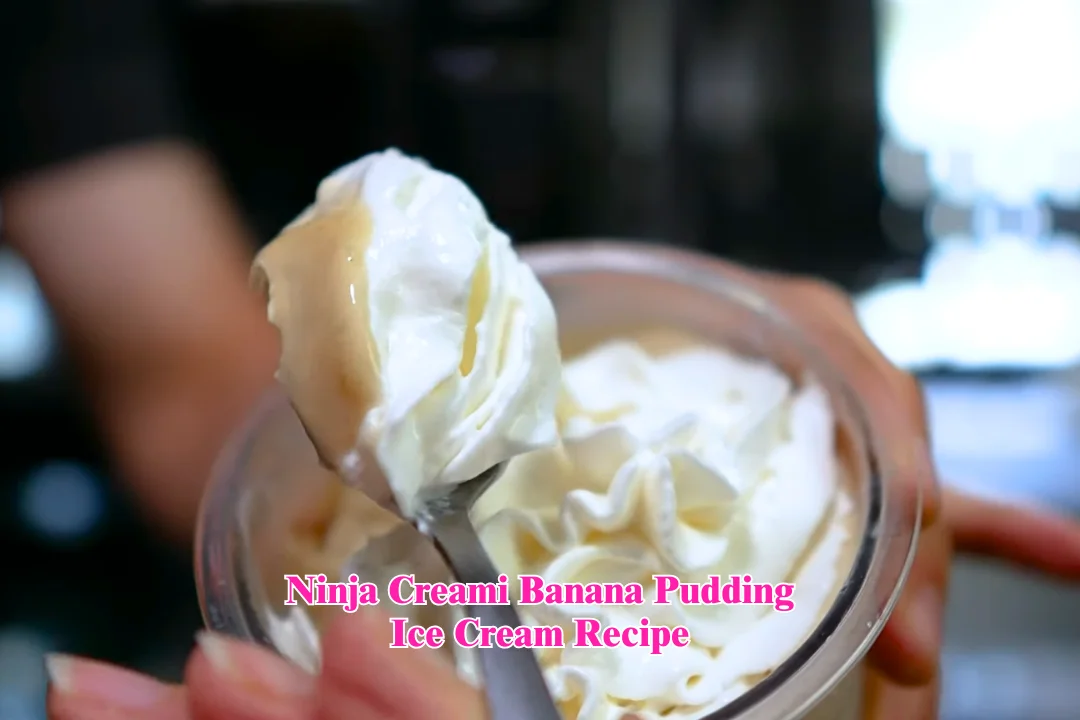
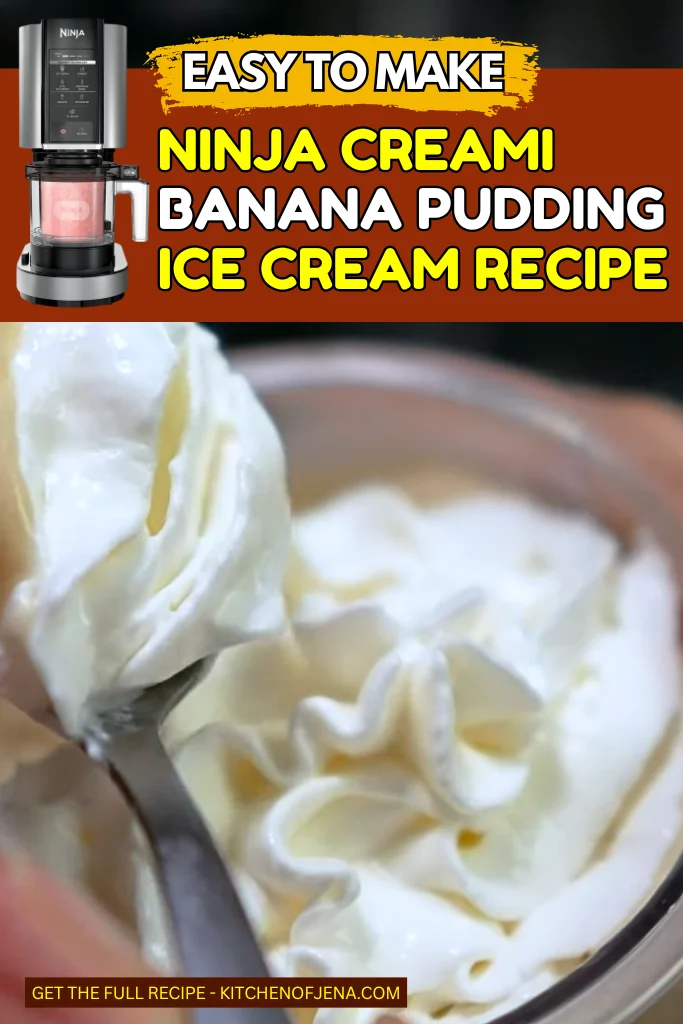
Ninja Creami Banana Pudding Ice Cream Recipe (My New Favorite Treat)
I made this Ninja Creami Banana Pudding Ice Cream Recipe one night when I was craving something cold, sweet, and creamy but didn’t want a heavy dessert.
I kept thinking about that classic banana pudding flavor. Soft banana. Creamy vanilla. That smooth, rich bite. So I grabbed my Ninja Creami and gave it a try.
This banana pudding ice cream came out thick, creamy, and full of real banana taste. It feels like comfort food, but it’s lighter and packed with protein. I use ripe banana, fat-free Fairlife milk, and sugar-free banana cream pudding mix to keep it sweet without extra fat. It’s simple ingredients, nothing fancy.
If you love banana desserts and want a treat that won’t slow you down, this one is for you.
Trust me, once you try this banana pudding ice cream made with Ninja Creami, you’ll keep making it again and again.
Why Ninja Creami is Perfect To Make This Banana Pudding Ice Cream?
I have tried making ice cream the old way. It takes forever and you need a lot of ice and salt. That is why I bought the Ninja Creami. This machine changes everything. It takes frozen solid pucks and turns them into soft serve in minutes.
Here is why I think this machine is the best choice for this recipe:
The texture is perfect. The Ninja Creami creates a texture just like store bought ice cream. It is not icy or hard to scoop. It is smooth and creamy every single time I make it.
It is fast. After the freeze time, the actual spinning takes two minutes. I do not have to wait hours for a machine to churn. I spin it and eat it right away.
Easy to clean. I just rinse the bowl and the blade. There are no small parts that break or get lost in my drawer. It is ready for next time.
It makes one pint. I am the only one in my house who eats this flavor. I do not want a gallon sitting around. One pint is perfect for me and I do not overeat.
Perfect For
Hot summer afternoons when you want something cold but do not want to waste your calories on a milkshake from the drive thru.
After the gym because you need protein but you do not want another shake. This tastes like a cheat meal but it is not.
Late night Netflix when you are watching your show and crave something sweet in a bowl.
Kids coming home from school because it is better than the sugar filled stuff in the freezer aisle and they still think it is a treat.
Meal prep Sunday so you have your desserts ready for the whole week and you do not grab cookies instead.
When you are sad and you need comfort food that reminds you of childhood but will not ruin your diet.
Brunch with friends because you can scoop it into pretty bowls and everyone will ask for the recipe.
Ninja Creami Banana Pudding Ice Cream Ingredients
70 grams ripe banana – I use a yellow banana with a few light brown spots, but not mushy. It gives natural sweetness and real banana flavor. The banana also helps make the texture creamy once it spins in the Ninja Creami.
1 cup (240 ml) fat-free Fairlife milk – I always use fat-free Fairlife milk because it has extra protein and zero fat. It keeps this ice cream light but still creamy. It blends smooth and works perfect in my Ninja Creami.
¼ teaspoon xanthan gum – Just a small amount makes a big difference. Xanthan gum helps thicken the base so the ice cream turns creamy instead of icy. I don’t skip this because it really improves the final texture.
2 tablespoons zero-calorie sweetener (monk fruit & erythritol blend) – I use a monk fruit and erythritol blend for sweetness without extra sugar. It tastes clean to me and doesn’t leave a strong aftertaste. You can adjust the amount if you like it sweeter.
Slightly less than ⅛ teaspoon salt (small pinch) – I add a tiny pinch of salt. It may sound small, but it makes the banana flavor stronger and more balanced. Without it, the ice cream can taste a little flat.
8 grams Jell-O zero sugar banana cream pudding mix – This is what gives that bold banana pudding flavor. I use the Jell-O zero sugar banana cream kind. It also helps thicken the base and makes the ice cream taste like classic banana pudding.
1 tablespoon milk (only if needed for respin) – After the first spin, if the texture looks crumbly, I add one tablespoon of milk right in the center. Then I hit respin. It turns soft and smooth like soft serve.
Optional Topping:
Fat-free Ready Whip (2–6 tablespoons, optional) – I like to top mine with fat-free Ready Whip. It adds that true banana pudding feel without many extra calories. I use as much or as little as I’m in the mood for.
Kitchen Appliances You’ll Need
- Ninja Creami machine – This is the main tool that makes the magic happen.
- Blender – You need this to mix the banana and milk until it is totally smooth.
- Kitchen scale – This helps you weigh the banana exact so the macros stay right.
- Ninja Creami pint container – This comes with your machine. You freeze the mix inside this special tub.
How To Make Ninja Creami Banana Pudding Ice Cream
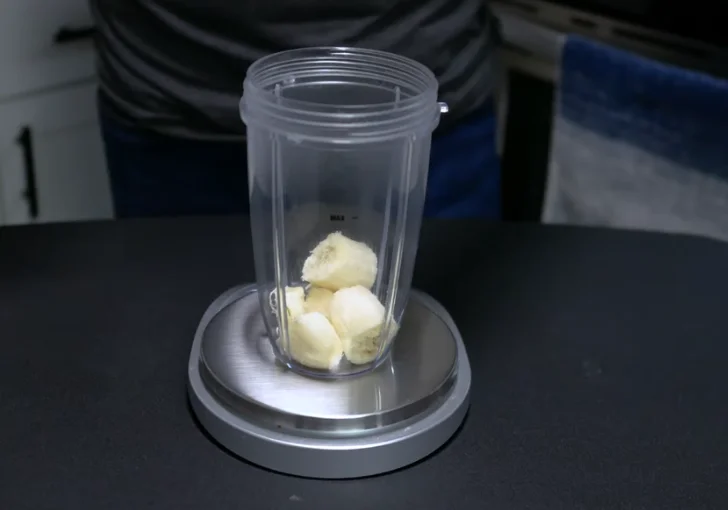
Step 1 | Weigh and Prepare the Banana
Place a blender cup on a kitchen scale and weigh out 70 grams of banana. Use a banana that is ripe with a few brown spots but still firm. Avoid overly soft or mushy bananas, as that can affect texture and flavor balance. Break the banana into chunks and add it to the blender cup.
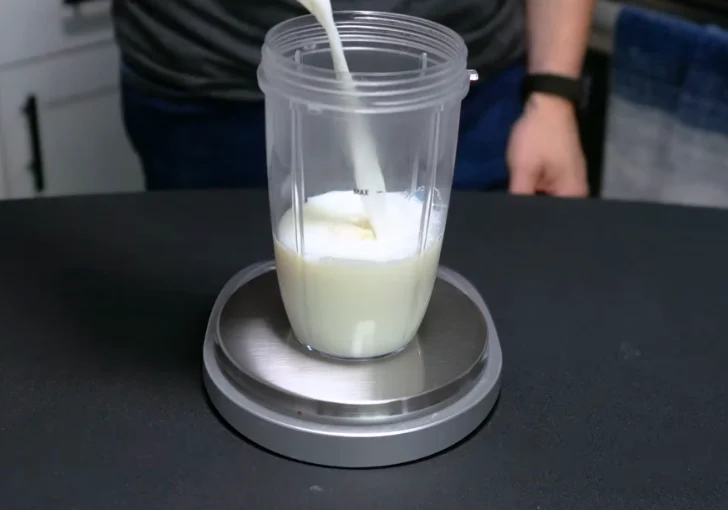
Step 2 | Add the Liquid Base
Pour 1 cup of fat-free Fairlife milk into the blender cup with the banana. This milk keeps the recipe high in protein while remaining very low in fat and calories.
Step 3 | Add Dry Ingredients
Add ¼ teaspoon xanthan gum to help thicken the mixture and create a creamy texture once frozen and spun. Add 2 tablespoons of zero-calorie sweetener for sweetness. Add a small pinch of salt (just under ⅛ teaspoon) to enhance flavor. Finally, add 8 grams of zero sugar banana cream pudding mix to give the strong banana pudding flavor.
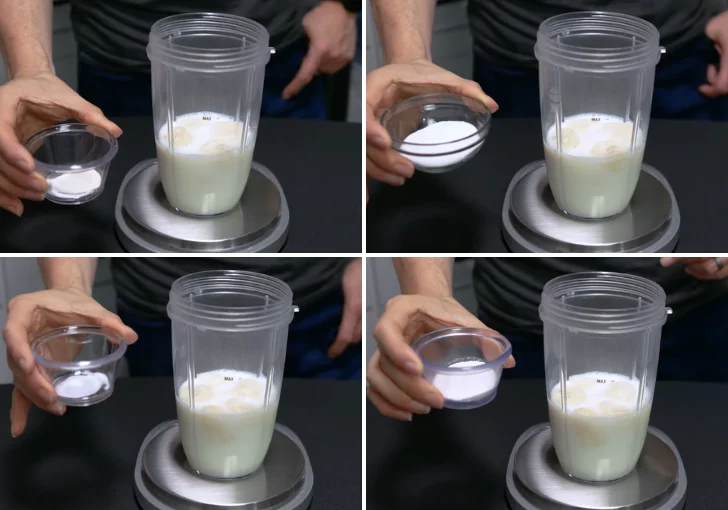
Step 4 | Blend the Mixture
Secure the blender blade and blend until completely smooth. Ensure there are no banana chunks remaining. The mixture should look creamy and evenly combined.
Step 5 | Transfer to Pint Container
Pour the blended mixture into a Ninja Creami pint container. Secure the lid tightly.
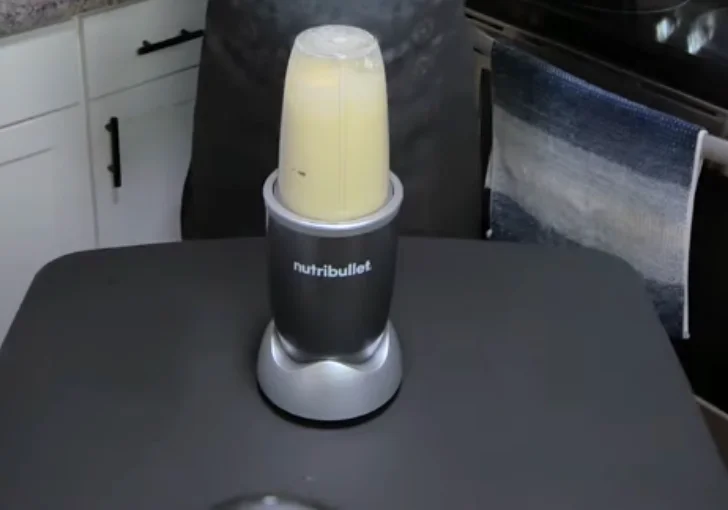
Step 6 | Freeze
Place the pint container in the freezer on a level surface. Freeze for at least 24 hours to ensure it is completely solid.
Step 7 | Prepare for Spinning
Remove the frozen pint from the freezer and allow it to sit at room temperature for about 10 minutes. Alternatively, briefly run warm water along the outside of the container to slightly soften the exterior.
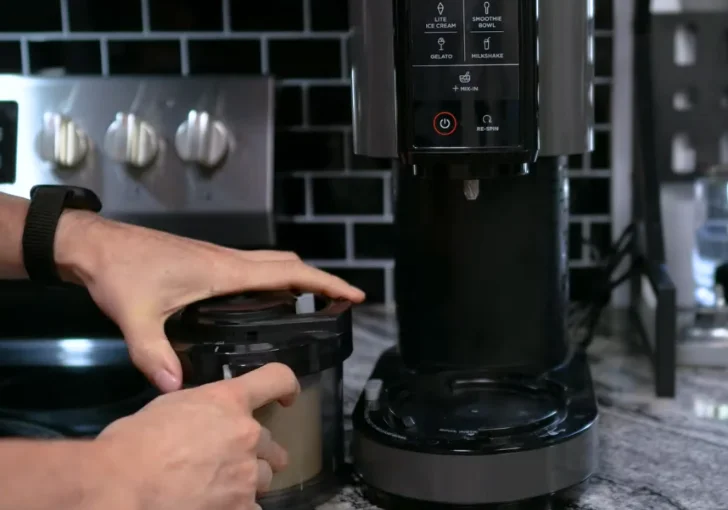
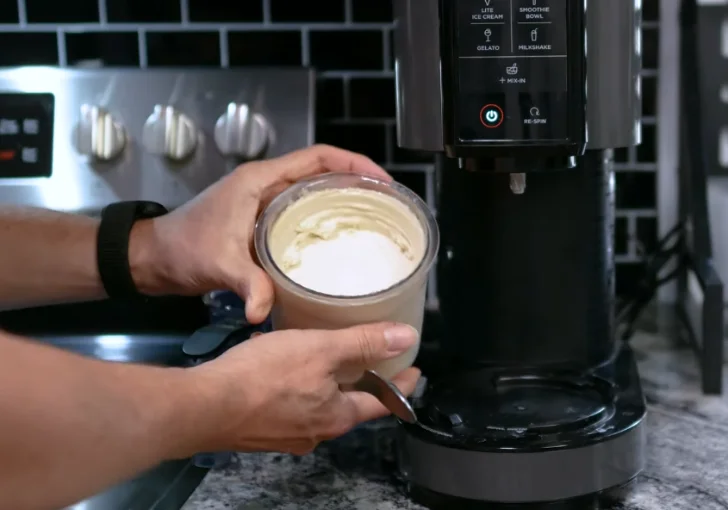
Step 8 | First Spin
Insert the pint into the Ninja Creami machine and process using the “Light Ice Cream” setting. Allow the full cycle to complete.
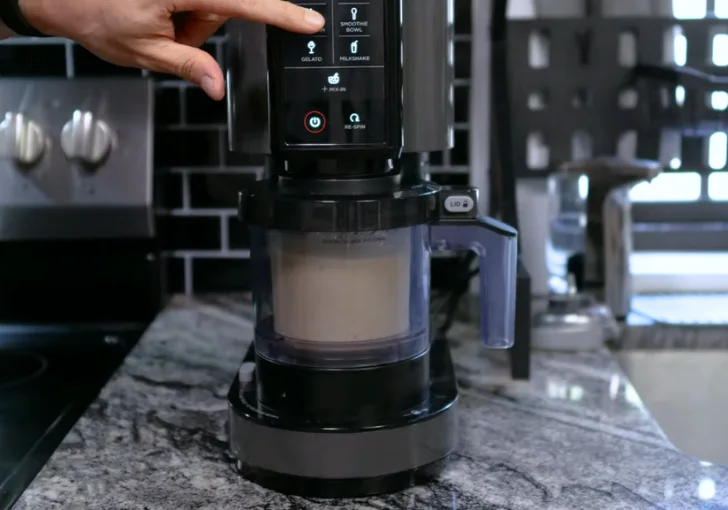
Step 9 | Check Texture
After the first spin, check the texture. If it appears creamy and smooth, it is ready to eat. If a slightly softer consistency is desired, proceed to the next step.
Step 10 | Respin for Softer Texture (Optional)
Add 1 tablespoon of milk directly into the center of the ice cream. Return the pint to the machine and run the “Respin” setting once. This creates a smoother, soft-serve consistency.
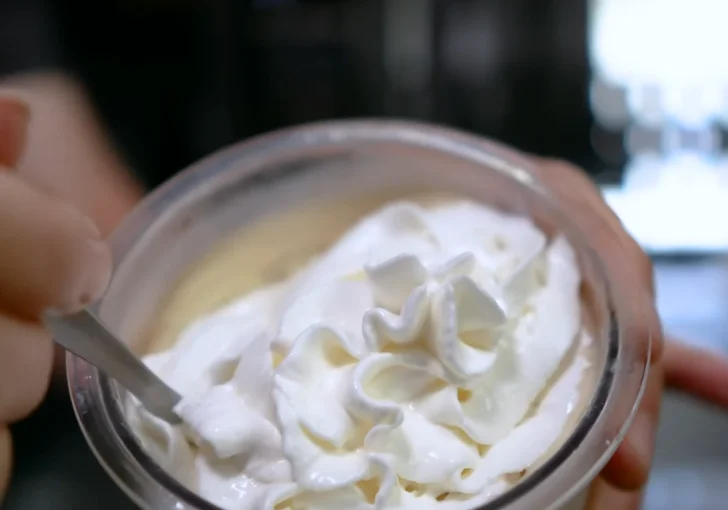
Step 11 | Add Optional Topping
Top with fat-free Ready Whip if desired. The whipped topping enhances the banana pudding flavor and adds minimal calories. Use as much or as little as preferred.
Tips & Notes for the Best Ninja Creami Banana Pudding Ice Cream
Use the right banana stage
I always pick a banana that is yellow with a few light brown spots. If it’s too green, the flavor is weak. If it’s too brown and mushy, the taste gets too strong and almost heavy.
Freeze the full 24 hours, no shortcuts
I know it’s tempting to spin it early, but I tried that once and the center was still soft. The texture turned icy and uneven. A full 24-hour freeze really makes a big difference.
Make the top flat before freezing
After pouring the mix into the pint, I tap it gently on the counter to level it out. A smooth, flat top helps the Ninja Creami spin everything evenly and avoids dry spots.
Don’t skip the salt
It’s just a tiny pinch, but I promise it matters. Without salt, the ice cream tastes a little flat. With it, the banana pudding flavor pops and feels more balanced.
Always try respin before adding extra milk
After the first spin, it may look crumbly. That’s normal for low-fat recipes. I always hit respin once before adding more milk. Most times, that alone fixes the texture.
Store the pint flat in the freezer
I keep my pint on a flat surface in the freezer so it freezes evenly. If it sits tilted, one side can freeze harder than the other and affect the spin later.
Variations and Adaptations
Add crushed vanilla wafers
After spinning, mix in a few crushed vanilla wafers. It gives classic banana pudding crunch and makes it feel more like dessert from childhood.
Chocolate banana twist
Add 1 teaspoon cocoa powder to the base before blending. It turns into banana chocolate flavor. Tastes like frozen banana dipped in chocolate.
Peanut butter swirl
After spinning, add 1 teaspoon powdered peanut butter and respin. It adds nutty taste without too many calories.
Strawberry banana version
Replace half the banana with strawberries. It gives fresh fruit flavor and pretty pink color.
Extra protein boost
Add 1 scoop vanilla protein powder. You may need extra splash of milk before spinning to keep texture smooth.
Mistakes To Avoid
I’ve made these myself, so I’m telling you from real trial and error. Small changes can really affect the final texture and flavor
Using too ripe banana – I once used a banana that was very brown and extra soft. The flavor turned too strong and almost syrupy sweet. It also changed the balance of the pudding mix. Stick with yellow and lightly spotted for best taste.
Not blending the base completely smooth – If tiny banana pieces stay in the mix, they freeze into hard bits. After spinning, the ice cream feels grainy instead of creamy. I always blend a little longer than I think I need.
Skipping the respin when texture looks crumbly – Low-fat ice cream often looks dry after the first spin. I used to think I messed it up. But hitting respin usually fixes it and makes it smooth like soft serve.
Adding too much milk before the first spin – One time I thought extra milk would make it creamier. It didn’t. It turned icy and thin. The base needs to freeze solid and thick, so follow the measurements closely.
Not freezing a full 24 hours – I tried spinning at 12–14 hours once, and the center was still soft. The machine struggled and the texture came out uneven. A full freeze is non-negotiable for this recipe.
Serving Ideas and Mix-ins
Classic bowl with whipped topping – Scoop the banana pudding ice cream into a bowl and top with fat-free whipped cream. It’s creamy, sweet, and brings back that classic banana dessert feeling you’ll love.
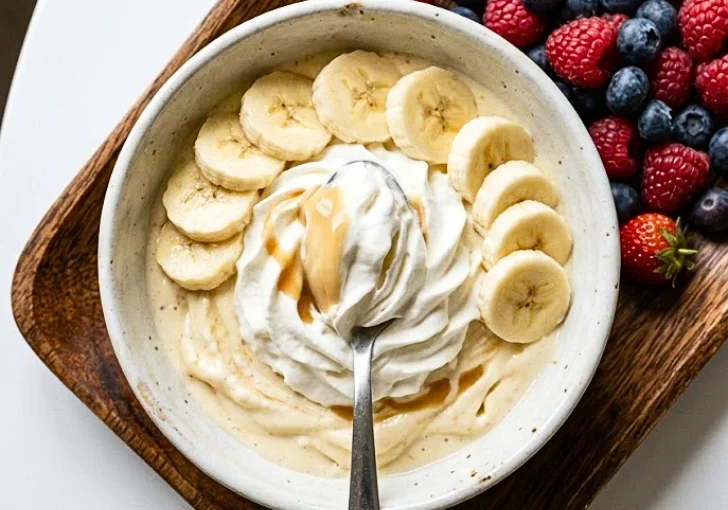
With sliced fresh banana – Add a few thin banana slices on top of your ice cream. It brightens the dish, adds fresh natural sweetness, and makes every bite feel more indulgent without extra sugar.
Over crushed graham crackers – Sprinkle crushed graham crackers at the bottom or on top of your ice cream. The crunch contrasts the creamy texture perfectly, giving a fun twist on traditional banana pudding.
Ice cream sandwich style – Spread the ice cream between two soft, light cookies. Freeze for about 30 minutes, then enjoy a handheld treat that tastes richer and more decadent than a regular scoop.
Protein dessert plate – Place a small scoop on a plate with fresh berries on the side. It turns simple ice cream into a lighter, elevated dessert that looks great and tastes fresh.
Leftover Storing
If I do not finish the whole pint, I smooth the top with a spoon. Then I put lid back on tight. I store it flat in freezer.
When I want more later, I let it sit out 10 minutes again. Then I respin. It comes back creamy. If it looks dry, I add small splash of milk and respin once.
I try to eat within 3–4 days for best taste. After that, it can get a little icy on top. Still good, just not as soft.
Ninja Creami Banana Pudding Ice Cream FAQs
Can I use regular milk instead of Fairlife?
Yes you can use regular skim milk or one percent milk. It will still freeze and spin fine. The calories will be about the same but the protein will drop down to around 8 grams instead of 14 grams. The taste will be good but Fairlife makes it thicker and creamier because of the extra protein.
What if I do not have xanthan gum?
You need the xanthan gum for this recipe. Without it the ice cream will be very icy and hard to scoop. It will feel like a popsicle instead of ice cream. You can buy it at any grocery store in the baking aisle. It lasts forever because you only use a little bit each time.
Can I use a different pudding flavor?
Yes you can swap the banana pudding mix for vanilla or cheesecake flavor. It will change the taste but it will still be good. I have tried butterscotch and it tastes like a candy bar. Just make sure it is the sugar free kind so you keep the calories low.
Can I make this without the Ninja Creami?
You cannot get this texture without the machine. If you try to blend it in a regular blender, it will just be a smoothie. You need the Ninja Creami blade to shave the frozen block. You could try a food processor but it will not be as smooth and creamy.
Why is my ice cream crumbly after the first spin?
This happens sometimes and it is normal. It means the mixture was very dry or very cold. Just add one tablespoon of milk to the center and run the respin cycle. It will turn into smooth soft serve. Do not throw it away if it looks like powder. The respin fixes everything.
Can I use frozen bananas?
You should not use frozen bananas for this recipe. You need to use a fresh ripe banana. The frozen banana changes the water content and it gets too mushy when blended. It also makes the ice cream too dense. Stick with fresh banana for the best results.
What if I hate monk fruit?
Swap it and add any zero-cal sweetener you like. Just match the sweetness level. Taste the mix before freezing. If it’s not sweet enough, add a bit more. Better to adjust early.

Ninja Creami Banana Pudding Ice Cream Recipe
This Ninja Creami Banana Pudding Ice Cream Recipe is creamy, sweet, and easy to make at home with your Ninja Creami ice cream maker. I use ripe bananas, fat-free Fairlife milk, and sugar-free banana cream pudding mix for a light, protein-packed dessert. It’s ready in about 25 minutes prep plus 24 hours freezing, with just simple steps anyone can follow. Perfect for a quick treat or a fun dessert twist. Serve in a bowl with whipped topping, over fresh banana slices, or with crushed graham crackers for extra crunch and flavor.
Ingredients
- 70 grams ripe banana (yellow with light brown spots, not mushy)
- 1 cup (240 ml) fat-free Fairlife milk
- ¼ teaspoon xanthan gum
- 2 tablespoons zero-calorie sweetener (monk fruit & erythritol blend)
- Slightly less than ⅛ teaspoon salt (small pinch)
- 8 grams Jell-O zero sugar banana cream pudding mix
- 1 tablespoon milk (only if needed for respin)
Optional Topping:
- Fat-free Ready Whip (approximately 2–6 tablespoons or as desired)
Instructions
- Place a blender cup on a kitchen scale and weigh out 70 grams of banana. Use a banana that is ripe with a few brown spots but still firm. Avoid overly soft or mushy bananas, as that can affect texture and flavor balance. Break the banana into chunks and add it to the blender cup.
- Pour 1 cup of fat-free Fairlife milk into the blender cup with the banana. This milk keeps the recipe high in protein while remaining very low in fat and calories.
- Add ¼ teaspoon xanthan gum to help thicken the mixture and create a creamy texture once frozen and spun. Add 2 tablespoons of zero-calorie sweetener for sweetness. Add a small pinch of salt (just under ⅛ teaspoon) to enhance flavor. Finally, add 8 grams of zero sugar banana cream pudding mix to give the strong banana pudding flavor.
- Secure the blender blade and blend until completely smooth. Ensure there are no banana chunks remaining. The mixture should look creamy and evenly combined.
- Pour the blended mixture into a Ninja Creami pint container. Secure the lid tightly.
- Place the pint container in the freezer on a level surface. Freeze for at least 24 hours to ensure it is completely solid.
- Remove the frozen pint from the freezer and allow it to sit at room temperature for about 10 minutes. Alternatively, briefly run warm water along the outside of the container to slightly soften the exterior.
- Insert the pint into the Ninja Creami machine and process using the “Light Ice Cream” setting. Allow the full cycle to complete.
- After the first spin, check the texture. If it appears creamy and smooth, it is ready to eat. If a slightly softer consistency is desired, proceed to the next step.
- Add 1 tablespoon of milk directly into the center of the ice cream. Return the pint to the machine and run the “Respin” setting once. This creates a smoother, soft-serve consistency.
- Top with fat-free Ready Whip if desired. The whipped topping enhances the banana pudding flavor and adds minimal calories. Use as much or as little as preferred.
Nutrition Information:
Serving Size: ~½ cupAmount Per Serving: Calories: 175Carbohydrates: 28gProtein: 14g
This Ninja Creami Banana Pudding Ice Cream Recipe is one of my favorite healthy treats. It is creamy, sweet, and full of real banana pudding flavor without heavy fat and sugar.
I love how simple it is and how good it fits into my day. When I make this Ninja Creami Banana Pudding Ice Cream, I feel like I treat myself but still stay on track.
I hope you try this recipe in your own kitchen. Once you taste it, you will want to make it again. If you make it, share your thoughts with me.