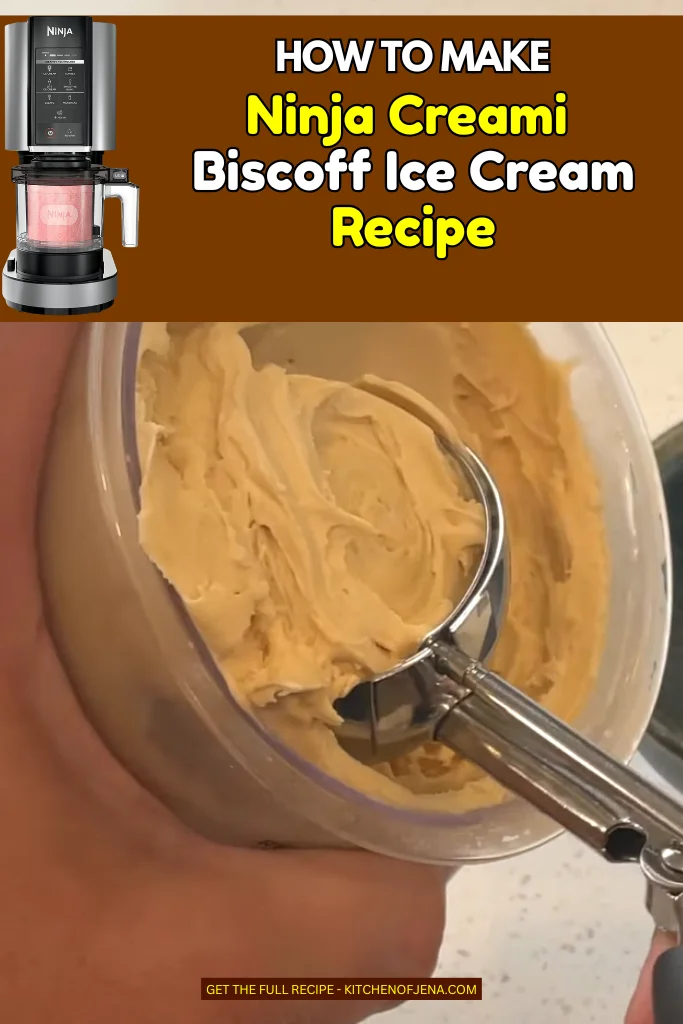
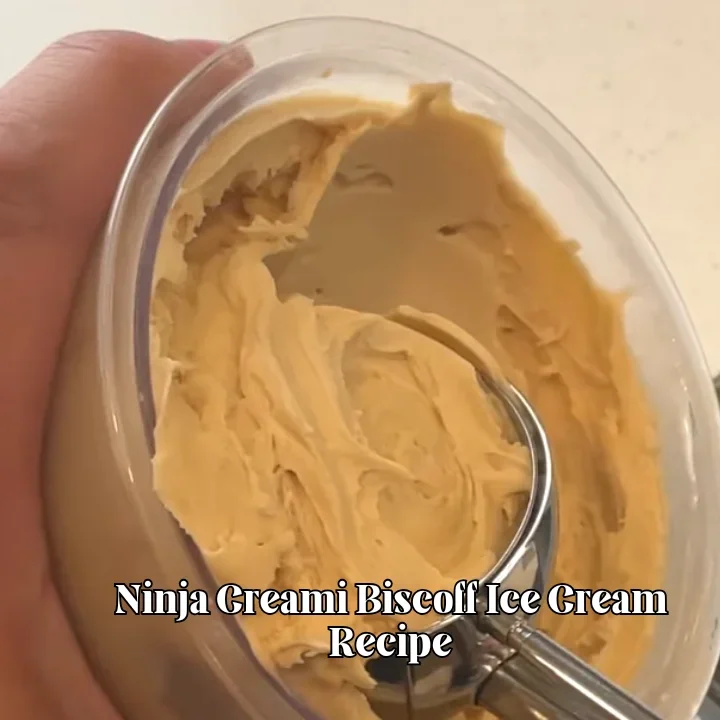
Ninja Creami Biscoff Ice Cream Recipe
Ninja Creami Biscoff Ice Cream Recipe came to me at that time of year when the heat starts fading, but the ice cream cravings don’t go anywhere. I kept thinking about that rich, creamy scoop you get from the store, but I wanted something better at home.
Ever since I got my Ninja Creami, I’ve been trying different ideas, and this one quickly became a favorite.
What I like most is how simple it feels. No strange ingredients, no extra stuff I can’t find nearby. Just cream, milk, condensed milk, and that smooth Biscoff spread.
The texture turns out thick, soft, and really creamy, almost like the premium tubs I used to buy.
If you enjoy a rich dessert, this one hits just right. You can serve it with crushed cookies or drizzle extra Biscoff on top for more flavor.
Why This Simple Recipe Creates a Rich Biscoff Flavor
High Fat Cream Makes It Thick
Heavy cream brings that rich and thick feel. I noticed when I use 30–35% fat cream, the ice cream turns soft and smooth, not icy at all.
Condensed Milk Adds Sweet Depth
Condensed milk is not just for sweetness. It gives a light caramel taste that blends perfectly with Biscoff. That’s where the deep flavor really builds.
Biscoff Spread Is the Star
The spread gives that warm, spiced cookie flavor. It melts into the base and makes the whole mix taste like cookies and caramel together.
Balanced with Milk
Milk helps control the richness. Without it, the mix feels too heavy. I found this balance makes it easier to scoop and enjoy.
The Moments That Call for This Recipe
- Hot afternoon when you just want something cold and sweet
- Late night craving when store ice cream feels boring
- Quick dessert after dinner without baking anything
- Weekend treat when you feel like making something fun
- Small get-together where you want to serve homemade dessert
- When you have a jar of Biscoff sitting unused
Ninja Creami Biscoff Ice Cream Ingredients
286 g heavy cream (30–35% fat) – I use full fat cream because it makes the ice cream rich and smooth. Lower fat cream won’t give the same texture, so I always stick to this range.
218 g milk (any fat percentage) – I usually use regular milk. It helps balance the richness and keeps the mixture from getting too thick or heavy.
1 can condensed milk (300 ml / approx. 350 g) – This adds sweetness and a slight caramel taste. I use the full can because it gives body and smooth texture.
156 g Biscoff spread – This is the main flavor. I use classic Biscoff spread because it blends well and gives that cookie butter taste everyone loves.
Kitchen Appliances You’ll Need
- Ninja Creami machine
- Mixing bowl
- Spoon or spatula
- Kitchen scale
- Ninja Creami pint container
- Freezer
How To Make Ninja Creami Biscoff Ice Cream
Step 1 | Prepare the Base Mixture
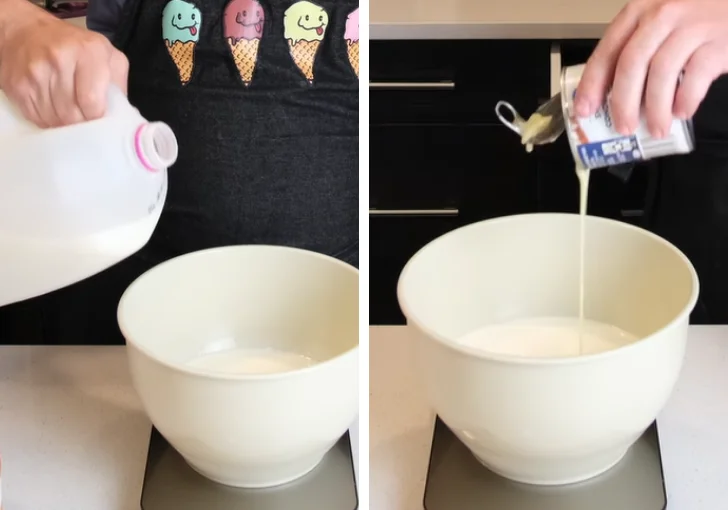
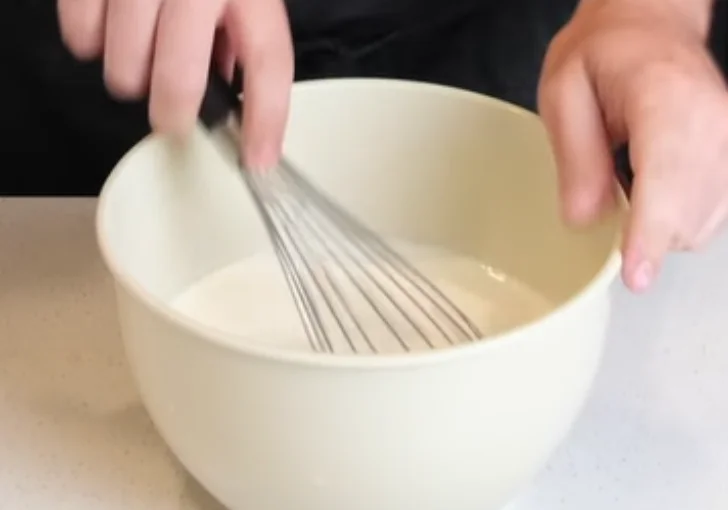
Add 286 g heavy cream and 218 g milk into a mixing bowl, then pour in the full can of condensed milk (300 ml / approx. 350 g). Stir these three ingredients together until evenly combined, creating a smooth liquid base with no separation.
Step 2 | Incorporate the Biscoff Spread
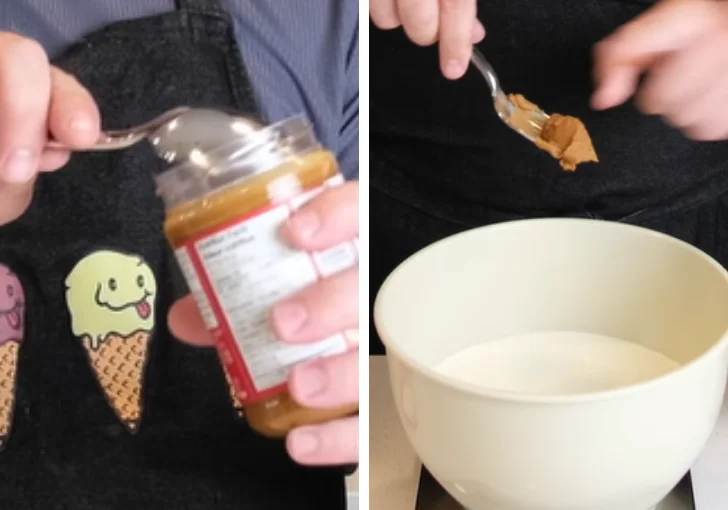
Add 156 g Biscoff spread directly into the base mixture. Begin mixing immediately; the spread will feel slightly firm when it hits the cold liquid, which is expected.
Step 3 | Mix Until Fully Smooth
Continue stirring the mixture thoroughly until the Biscoff spread fully dissolves into the liquid. Keep mixing until there are no lumps or streaks remaining and the base looks completely smooth and uniform.
Step 4 | Transfer to Container and Freeze
Pour the finished mixture into a Ninja Creami pint container. Secure the lid tightly and place it in the freezer. Freeze until fully solid, which typically takes about 5 hours or longer depending on temperature.
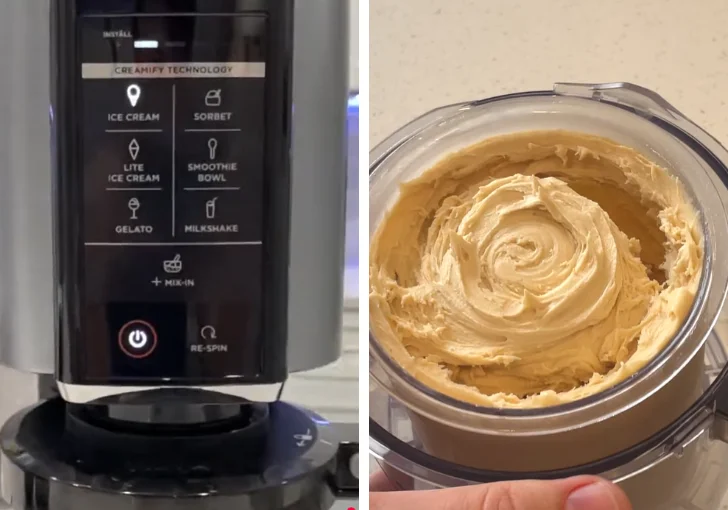
Step 5 | Spin the Ice Cream
Insert the frozen pint into the Ninja Creami machine and run the ice cream cycle. The mixture will transform into a thick, smooth, and creamy texture during this process.
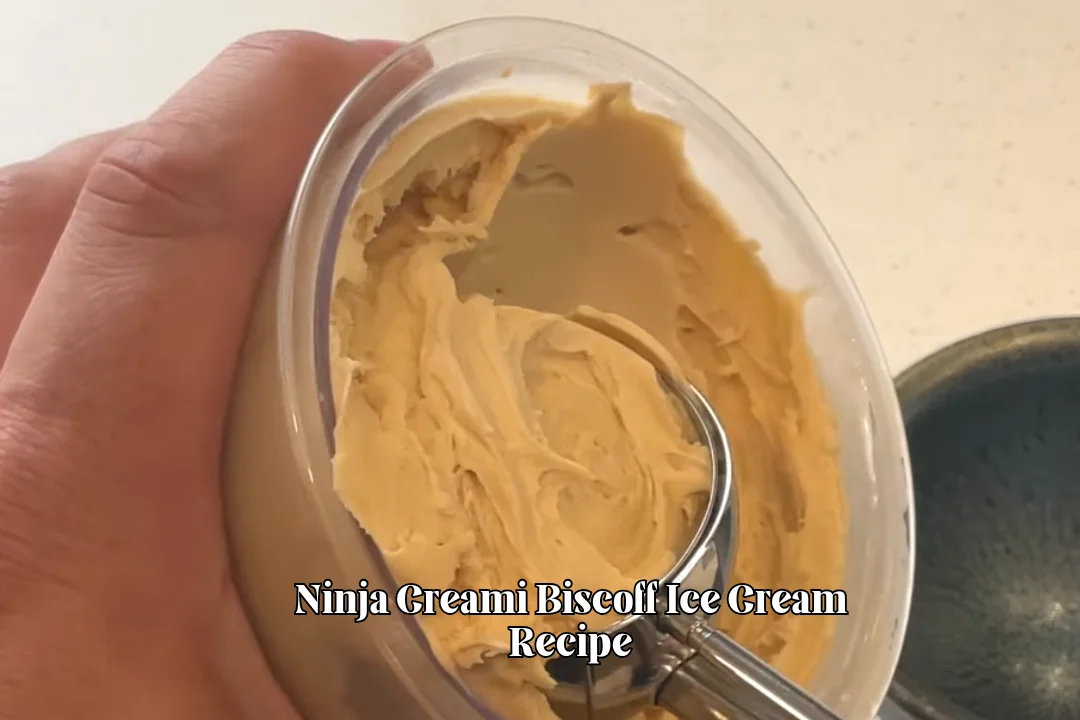
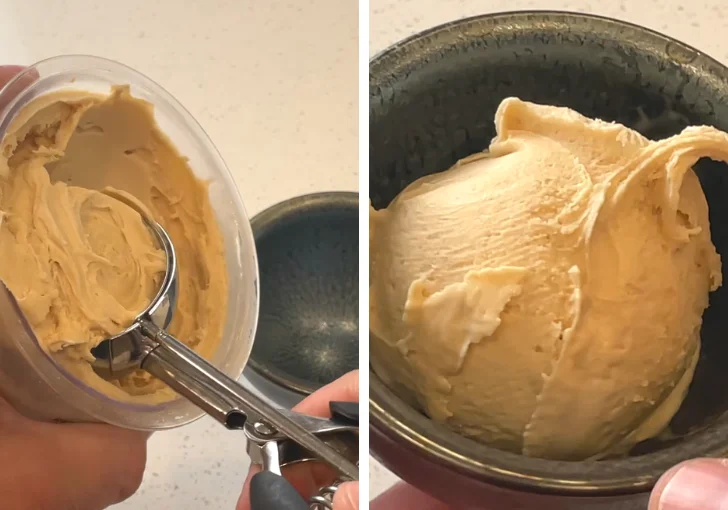
Step 6 | Scoop and Serve
After spinning, scoop the ice cream into a bowl and serve immediately. The texture should be ultra-smooth with no ice crystals, delivering a rich, creamy consistency and deep caramel-like Biscoff flavor.
Tips & Notes for the Best Ninja Creami Biscoff Ice Cream Recipe
Let the pint sit before spinning – If the pint is too hard straight from the freezer, I let it sit for 5 minutes. This helps the blade spin smoother and gives a better creamy texture.
Mix really well before freezing – I always make sure the Biscoff is fully mixed. If not, small lumps stay and affect the final texture after spinning.
Use full fat cream only – I tried lower fat once and it felt icy. Full fat cream makes a big difference in smoothness and taste.
Don’t rush freezing time – If the center is not fully frozen, the spin won’t work properly. I check the middle before putting it in the machine.
Re-spin if needed – Sometimes after first spin, texture looks crumbly. I run one more spin and it turns soft and creamy.
Variations and Adaptations
Add crushed cookies – Mix in crushed Biscoff cookies after spinning. It gives a slight crunch and makes the texture more fun to eat.
Use chocolate drizzle – Add a little melted chocolate on top. It adds a nice contrast to the sweet Biscoff flavor.
Make it lighter – Use low-fat milk and reduce cream slightly. It won’t be as rich, but still tastes good for a lighter version.
Add vanilla flavor – A small splash of vanilla extract can give a warmer taste and balance the sweetness a bit.
Swirl extra spread – Add a spoon of Biscoff after spinning and swirl lightly. It creates a stronger flavor in each bite.
Mistakes To Avoid While Making Ninja Creami Biscoff Ice Cream Recipe
Not mixing properly – If the base is not smooth, the final ice cream feels uneven. I made this mistake once and it had small chunks.
Using too much cream – More cream sounds good, but it makes the mix too heavy. The balance in this recipe is important.
Freezing for less time – Soft center leads to poor texture. I always freeze fully, even if it takes longer.
Skipping re-spin – First spin is not always perfect. One extra spin usually fixes texture and makes it smooth.
Wrong measurements – Guessing amounts changes the taste. I always use a scale to keep it accurate.
Serving Ideas and Mix-ins
Serve with crushed Biscoff cookies – I like adding crushed cookies on top. It gives a small crunch and makes each bite more fun without changing the base texture too much.
Drizzle warm Biscoff spread – Slightly warm the spread and drizzle over the scoop. It melts slowly and adds extra flavor in every spoon.
Add whipped cream topping – A little whipped cream on top makes it feel like a dessert from a shop. It also balances the rich base nicely.
Pair with brownies – Serving this ice cream with a warm brownie works really well. The mix of hot and cold makes it even better.
Make an ice cream sandwich – Use soft cookies and add a scoop in between. It turns into a quick dessert that feels special.
Leftover Storing
I usually store any leftover ice cream in the same Ninja Creami pint with the lid closed tight. It stays good in the freezer for about a week.
Before eating again, I let it sit for a few minutes, then run a re-spin to bring back the creamy texture. If it stays too long, it can get a bit hard, but re-spinning fixes that easily.
Ninja Creami Biscoff Ice Cream Recipe FAQs
Can I use regular milk instead of fat-free milk?
Yes, regular milk works perfectly fine in this recipe. I often use standard milk because it keeps the texture balanced. Whole milk gives a richer taste, while low-fat milk makes it slightly lighter but still smooth after spinning.
Why is my ice cream crumbly after spinning?
This happens when the mixture is too cold or slightly dry. I usually run the machine again on re-spin mode. It quickly turns the crumbly texture into a creamy and smooth consistency.
Can I reduce the sugar in this recipe?
You can reduce condensed milk slightly, but it may change texture. Sugar helps keep the ice cream soft. Less sugar can make it freeze harder and feel less creamy.
Do I need stabilizers for this recipe?
No, this recipe doesn’t need stabilizers. The high fat from cream and Biscoff already gives a smooth and stable texture after spinning.
Can I use crunchy Biscoff spread?
Yes, but the Ninja Creami will break down the crunch during spinning. If you want crunch, add crushed cookies after spinning instead.
How long should I freeze the mixture?
I freeze it for at least 5 hours, sometimes longer. The center must be fully solid before spinning to get the right texture.
Can I make this without a Ninja Creami?
This recipe is designed for the Ninja Creami. Without it, the texture will not be the same, since the machine creates that smooth finish.
Why does my ice cream taste too heavy?
This can happen if the cream amount is too high. Stick to the measurements to keep the balance between rich and smooth.
Can I add mix-ins before freezing?
I avoid adding mix-ins before freezing because they can sink or freeze unevenly. It’s better to add them after spinning.
How do I make it softer after storing?
I let the pint sit for a few minutes, then use re-spin mode. This brings back the soft and creamy texture quickly.
Ninja Creami Biscoff Ice Cream Recipe
This Ninja Creami Biscoff Ice Cream Recipe is rich, smooth, and full of caramel cookie flavor. I made it using simple ingredients like cream, milk, condensed milk, and Biscoff spread. It takes about 10 minutes to prepare and a few hours to freeze. The Ninja Creami machine turns it into a soft and creamy dessert with no ice crystals. This recipe is easy to follow and perfect for homemade ice cream lovers. You can serve it with cookies, drizzle, or enjoy it plain right after spinning.
Ingredients
- Ingredients
- 286 g heavy cream (30–35% fat)
- 218 g milk (any fat percentage)
- 1 can condensed milk (300 ml / approx. 350 g)
- 156 g Biscoff spread
Instructions
- Add 286 g heavy cream and 218 g milk into a mixing bowl, then pour in the full can of condensed milk (300 ml / approx. 350 g). Stir these three ingredients together until evenly combined, creating a smooth liquid base with no separation.
- Add 156 g Biscoff spread directly into the base mixture. Begin mixing immediately; the spread will feel slightly firm when it hits the cold liquid, which is expected.
- Continue stirring the mixture thoroughly until the Biscoff spread fully dissolves into the liquid. Keep mixing until there are no lumps or streaks remaining and the base looks completely smooth and uniform.
- Pour the finished mixture into a Ninja Creami pint container. Secure the lid tightly and place it in the freezer. Freeze until fully solid, which typically takes about 5 hours or longer depending on temperature.
- Insert the frozen pint into the Ninja Creami machine and run the ice cream cycle. The mixture will transform into a thick, smooth, and creamy texture during this process.
- After spinning, scoop the ice cream into a bowl and serve immediately. The texture should be ultra-smooth with no ice crystals, delivering a rich, creamy consistency and deep caramel-like Biscoff flavor.
Nutrition Information:
Serving Size: 1 bowlAmount Per Serving: Calories: 320Total Fat: 22gCarbohydrates: 28gSugar: 24gProtein: 4g
Ninja Creami Biscoff Ice Cream Recipe is one of those desserts that feels simple but tastes rich and special. I made it many times, and it always comes out smooth and full of flavor.
You don’t need many ingredients, just good balance and a little time. If you enjoy creamy ice cream with a deep caramel taste, this one is worth making at home.
Try it once and see how it turns out in your kitchen. Share your result and don’t forget to follow us on Pinterest for more easy recipes.